
Error recovery
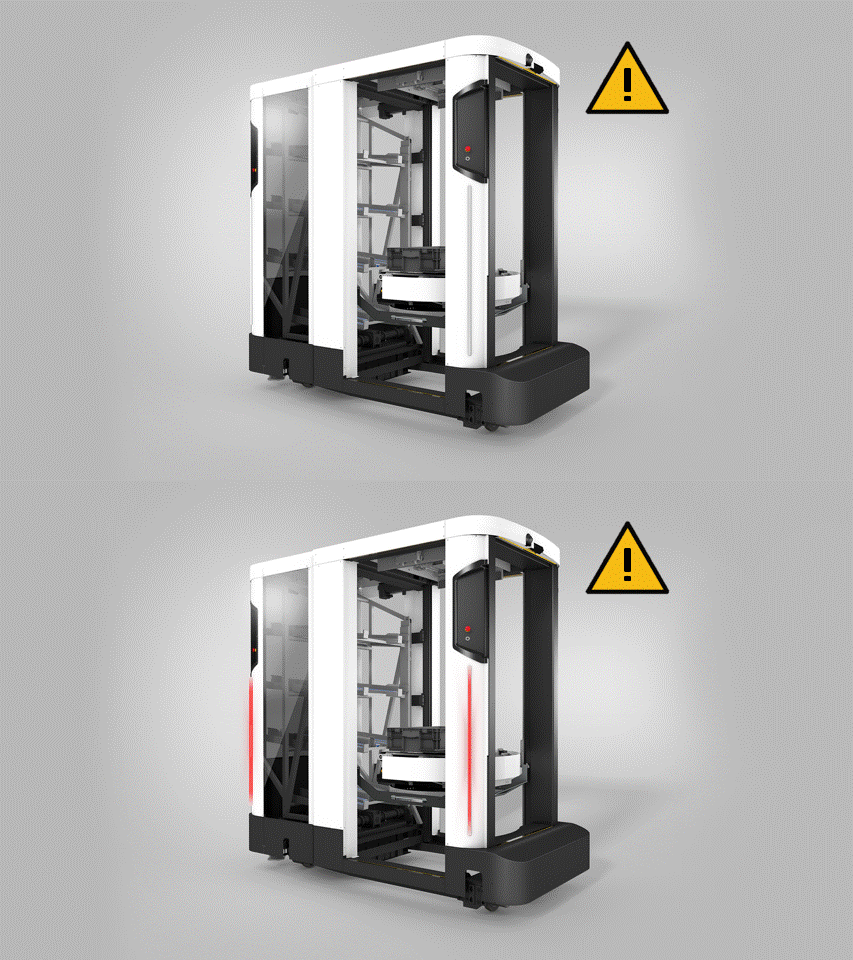
Whenever an error occurs, SOTO notfies personell with blinking red LED light signals.
Tutorials
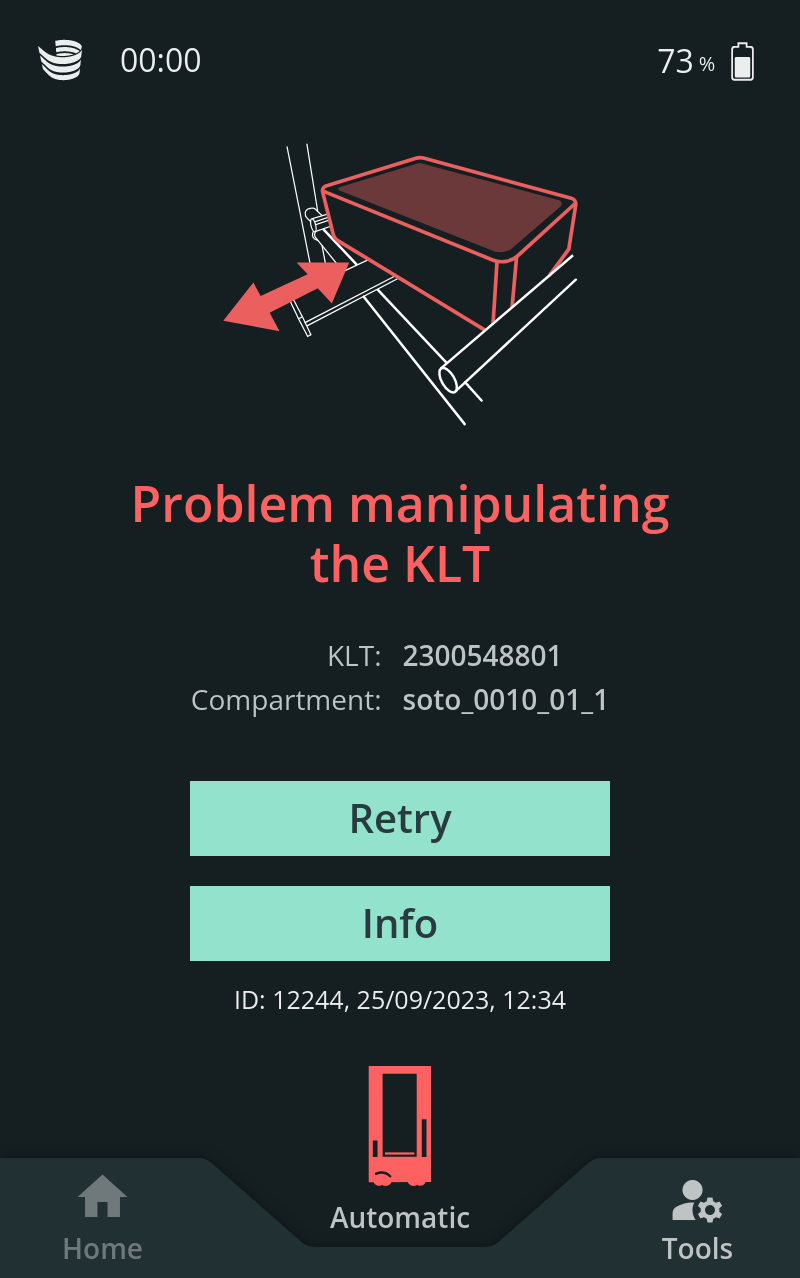
If an error occurs, the relevant error information is shown on the SOTO display. To resolve the error and continue operation, confirm the error on the screen and follow the instructions.
All SOTO error messaged are provided in a so-called "tutorial":
|
|
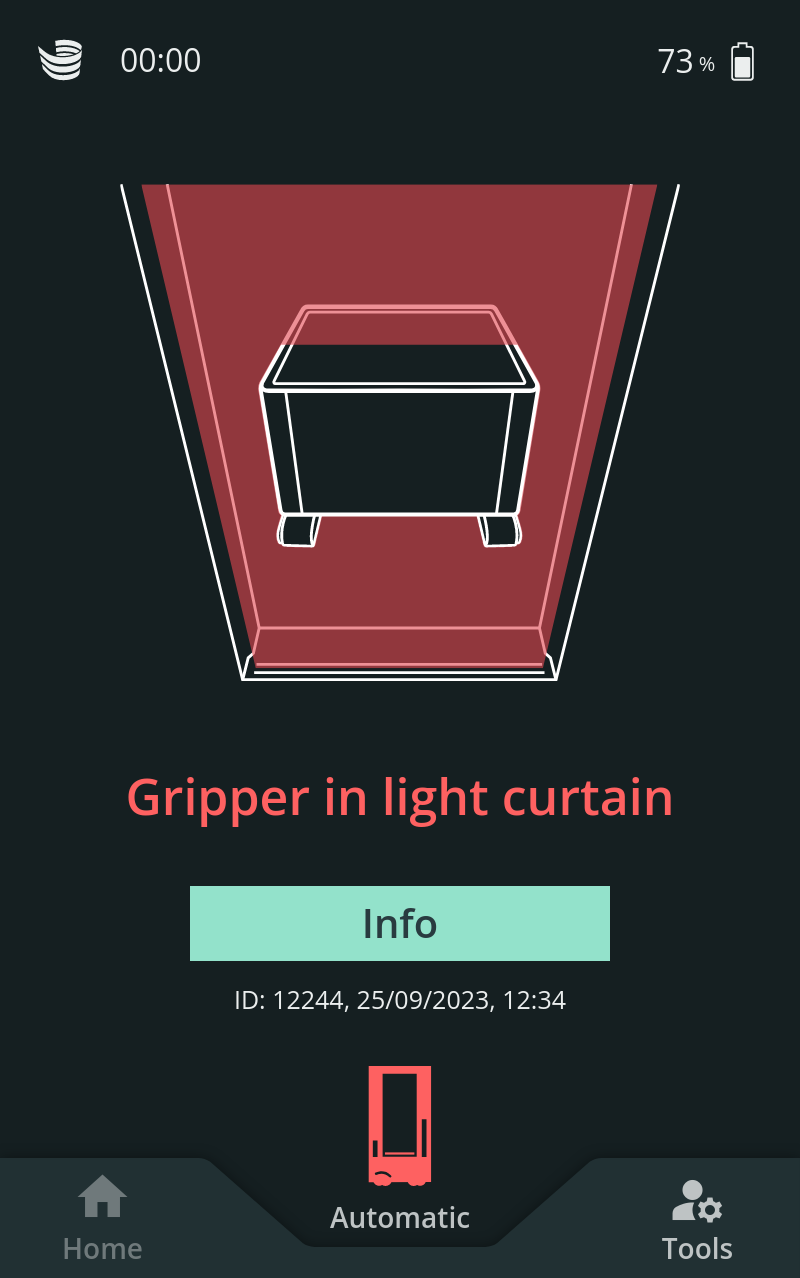
Example: Gripper in light curtain
|
Gripper violates light curtain |
Reason: The gripper is sticking out of the robot and is violating the light curtain. Solution: Press the emergency button. Push the gripper back into the robot. Ensure the load carrier remains on the gripper; do not remove it. Release the emergency stop button, confirm the error on the display and press the "Retry" button. Important: The distance between the two roller conveyors must remain the same and the load carrier must be positioned in the center of the gripper. |
|
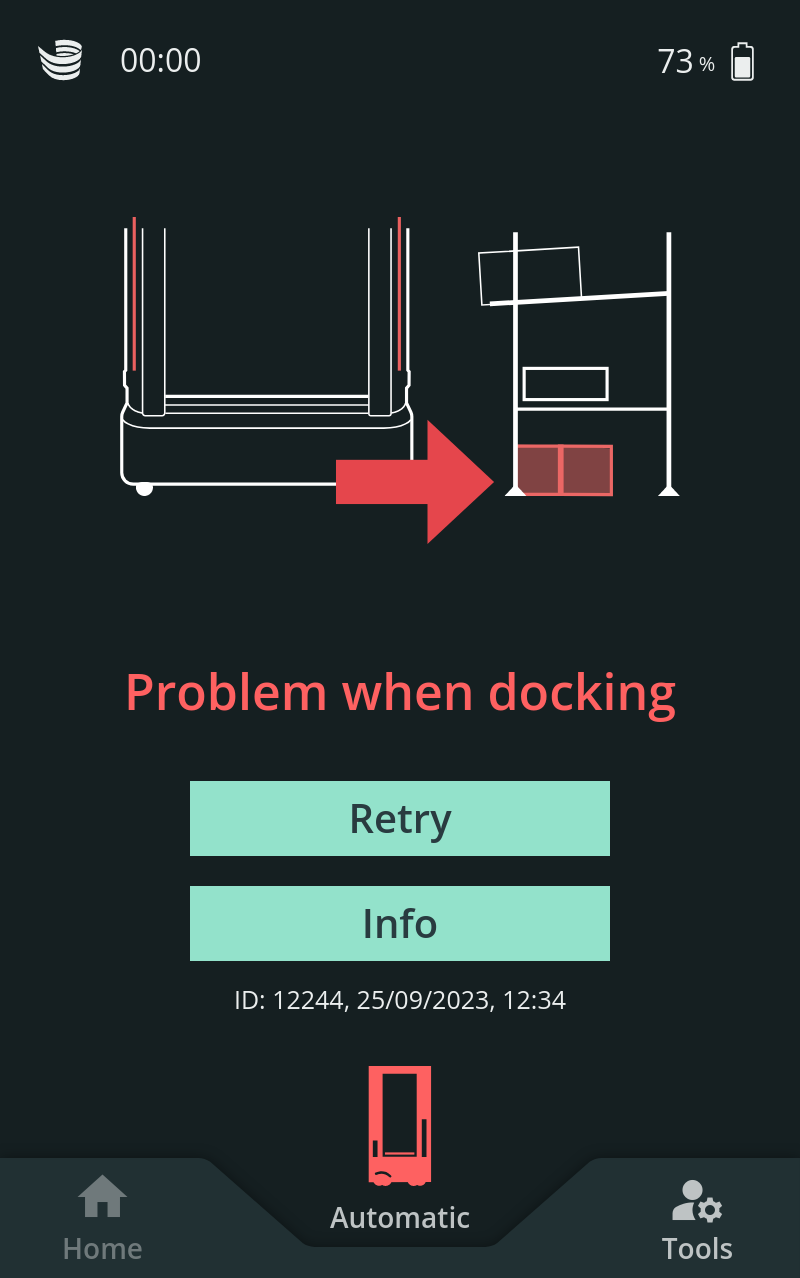
Example: Docking failed
|
Docking failed |
Reason: The robot is unable to dock to the handover station. This may be due to an obstacle obstructing the front of the shelf or the robot did not recognize the docking shape. Solution: Remove all obstacles in front of the handover station and check whether the docking shape is correctly positioned or damaged. |
|
Example: Adapter not recognized
|
Adapter not recognized |
Reason: The compartment's adapter was not recognized. This issue commonly appears due to damaged or missing components. Solution: Check that the adapter includes all necessary details, such as the QR code and reflective sticker. Confirm that the name of the compartment corresponds with the name provided in the instructions. Then press “Retry”. |
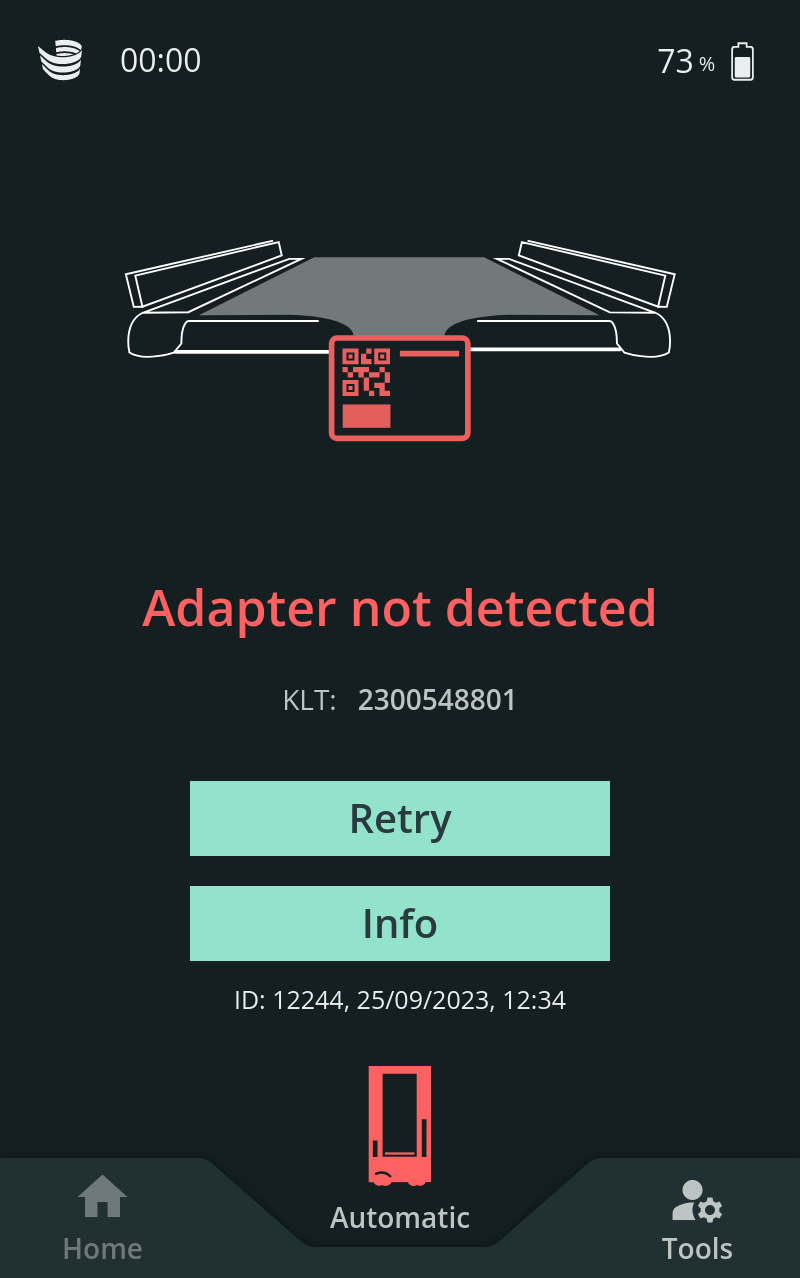
|
Example: Path to target blocked
|
Path to target blocked |
Reason: An obstacle is blocking the path of the robot. Solution: Remove the obstacle. The robot will continue driving automatically. |
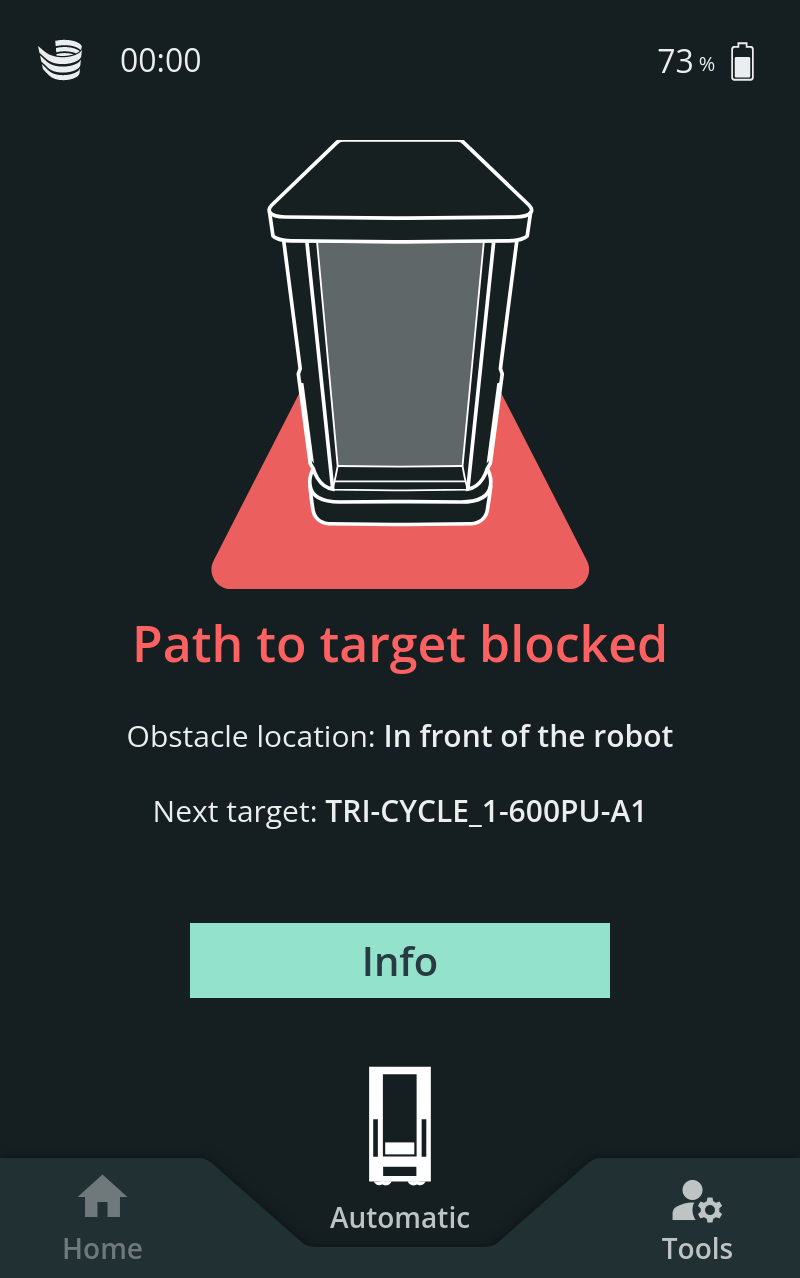
|
Internal error
|
Internal error |
Reason: Unknown software issue. Solution: Follow the on-screen instructions and press “Retry” or navigate to the “Tools” section to contact support. |
.png?cb=a0ab23cdf6cdf90da3f772a6d8eab2eb)
|
Hardware error
|
Hardware Error (Software restart) |
Reason: Unknown hardware issue. Solution: Try to restart the software. If the error persists, restart the robot in the “Tools” section. |
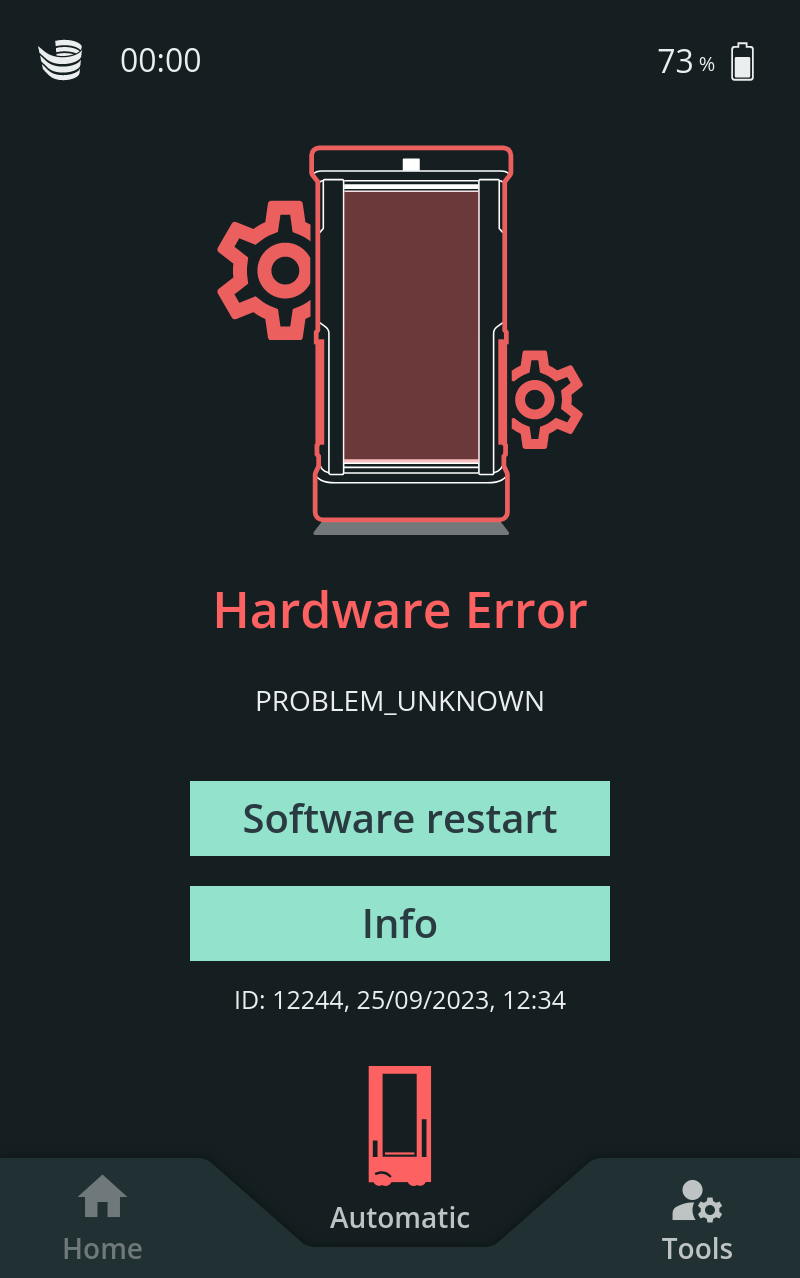
|
Access management
Access to advanced error recovery tools, robot settings and robot commissioning functions is restricted.
Pin
Enter your PIN in order to access advanced error recovery tools and change robot modes.
Make sure the pin is known only to authorized personnel.
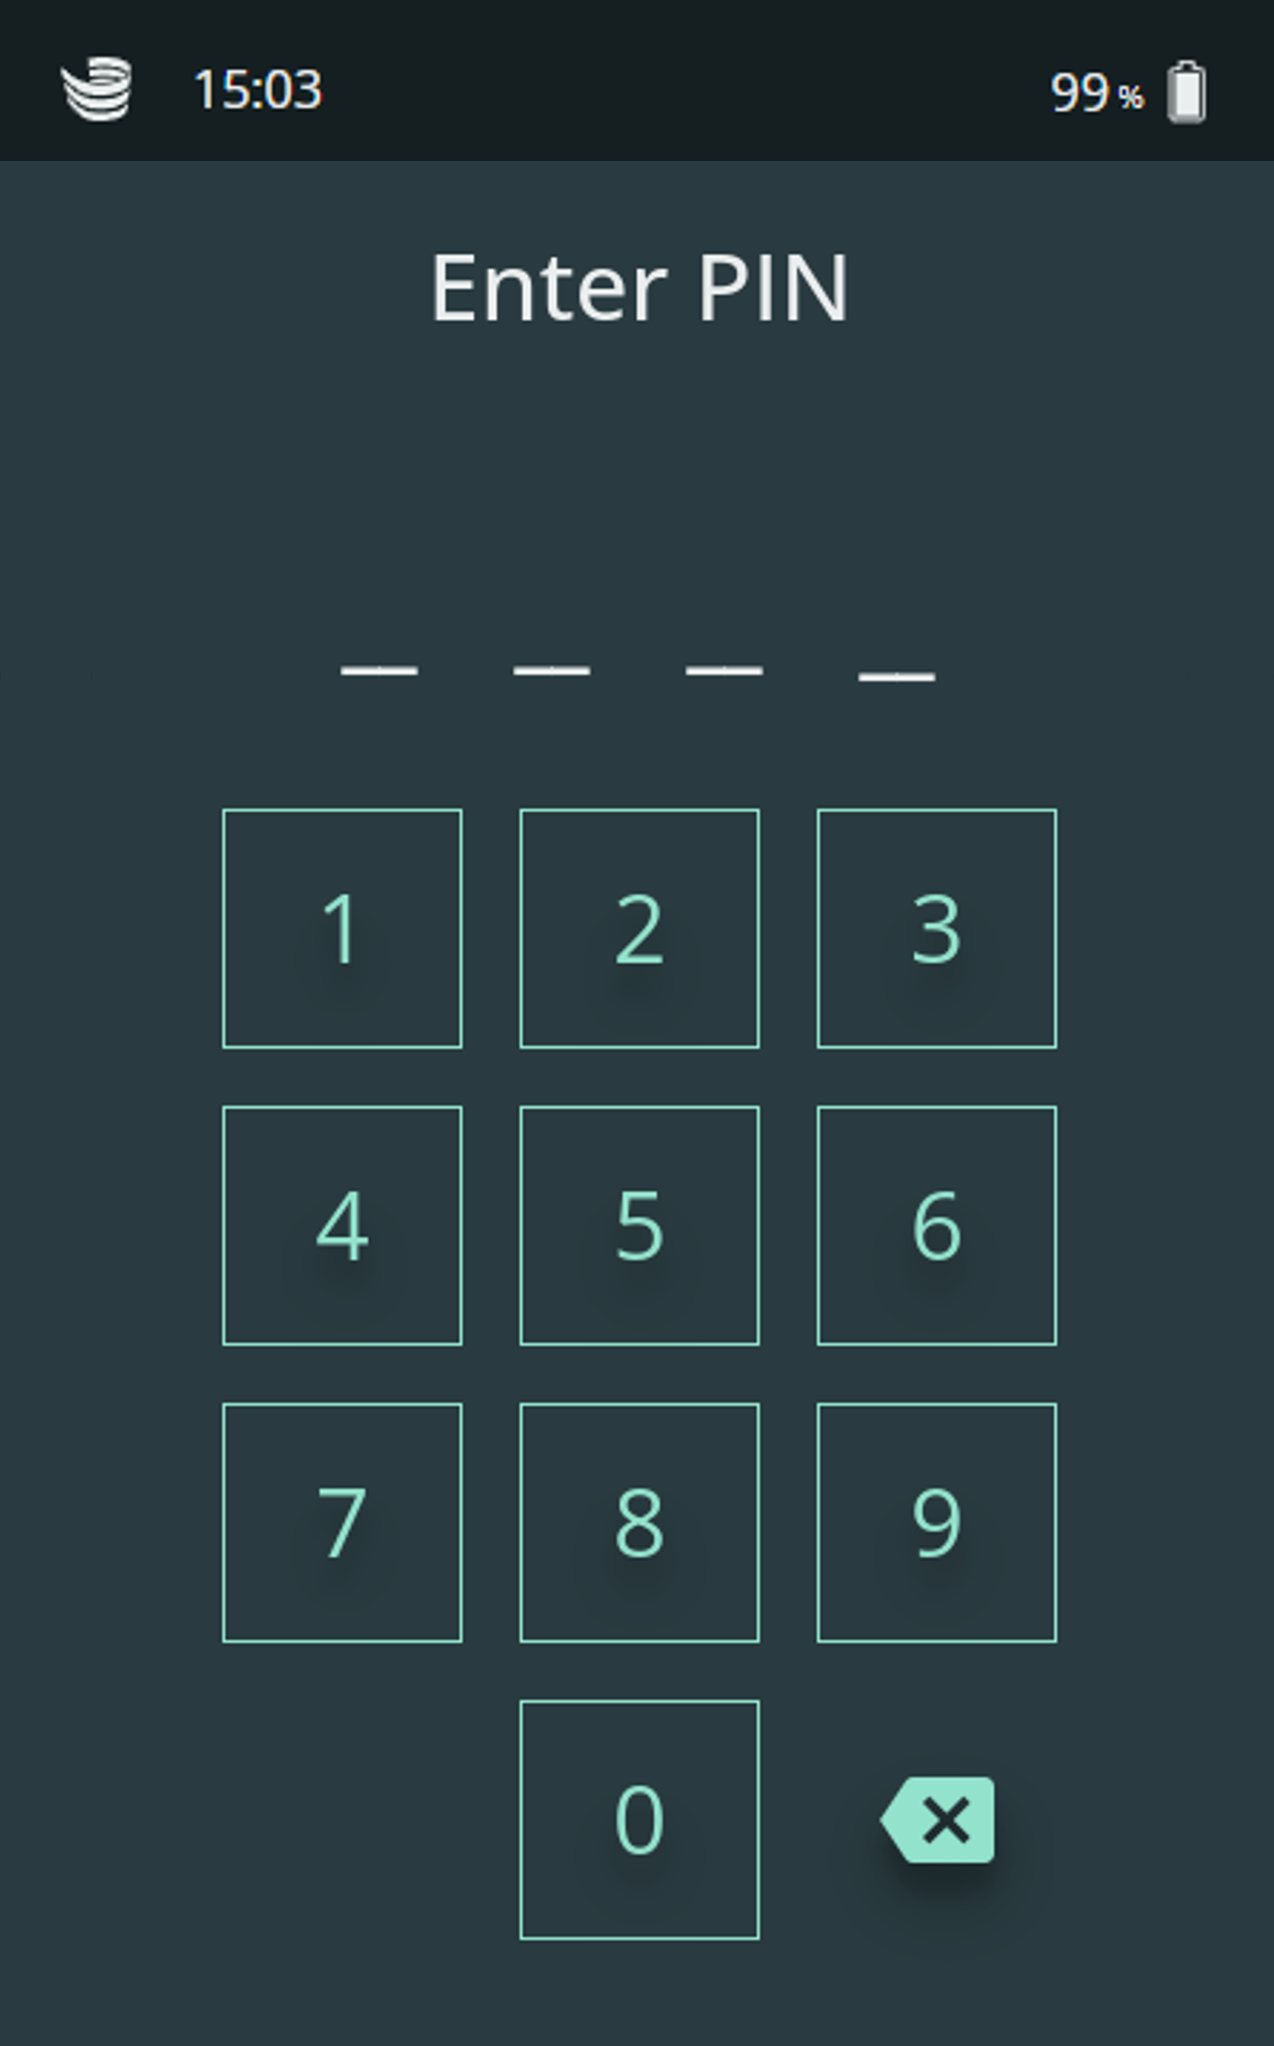
SOTO Display tools
SOTO also provides an optional set of tools that can be used to recover the robot.
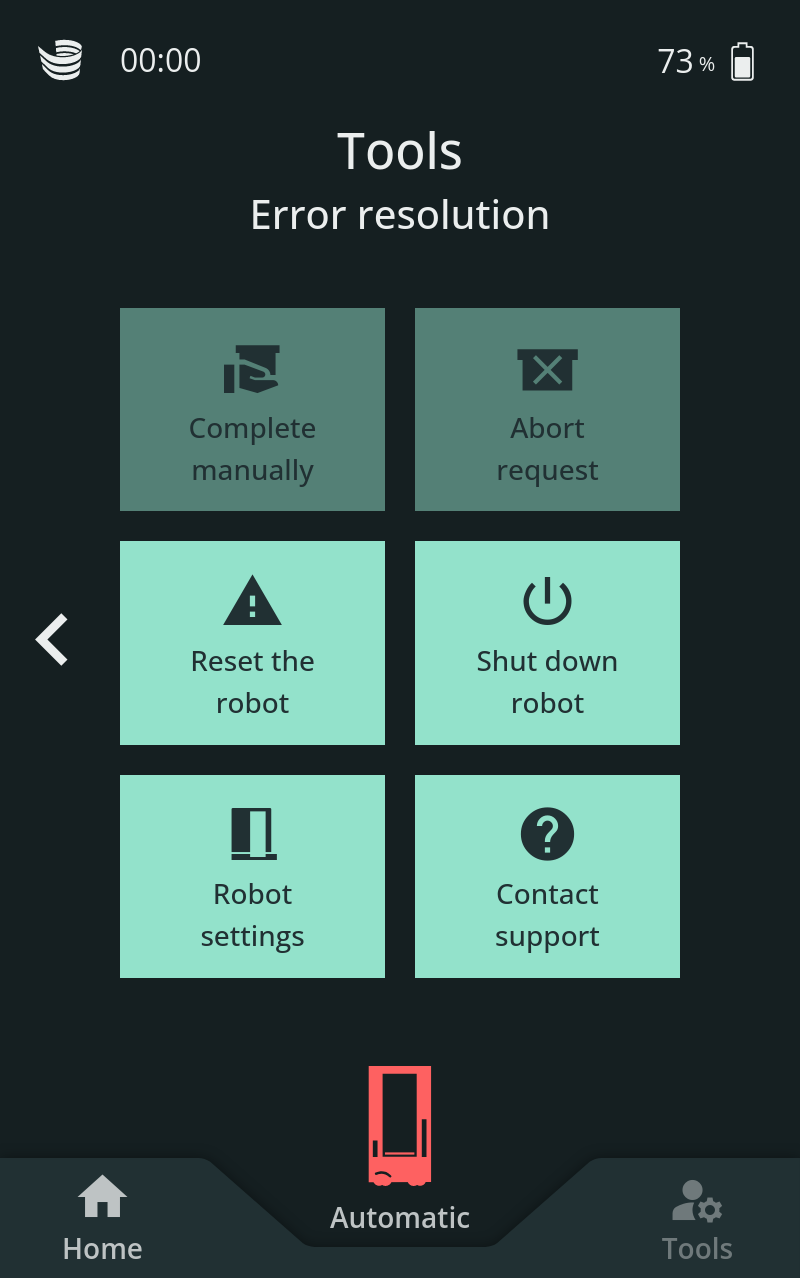
Tools
You can access the tools section by pressing the “Tools” button located at the bottom right-hand corner of the SOTO display.
Some of the tools are only available if the robot has an active order and an active error.
If no order or error is present the unavailable tools are faded out.
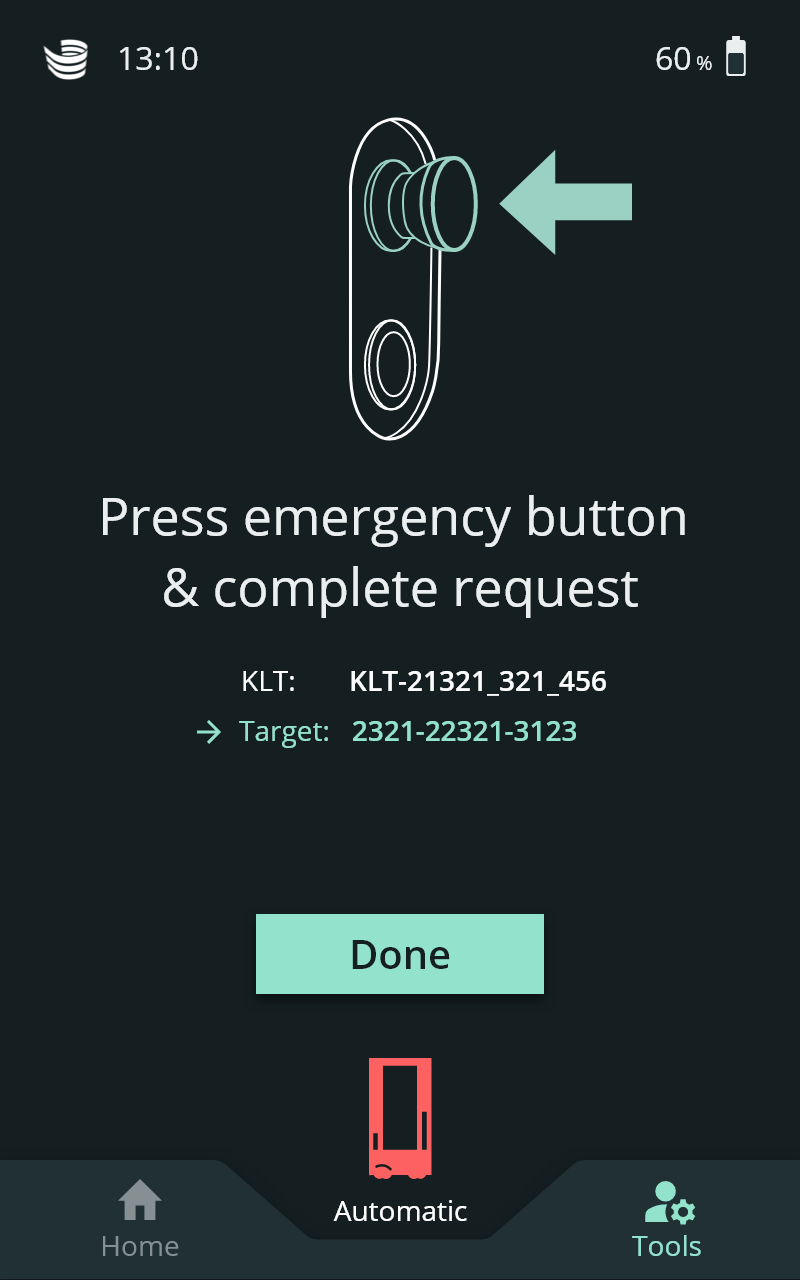
Complete order manually
|
Complete manually |
The current request is completed manually. The user must bring the load carrier to the target compartment manually. Refer to the information given on the SOTO display to identify the target compartment. |
|
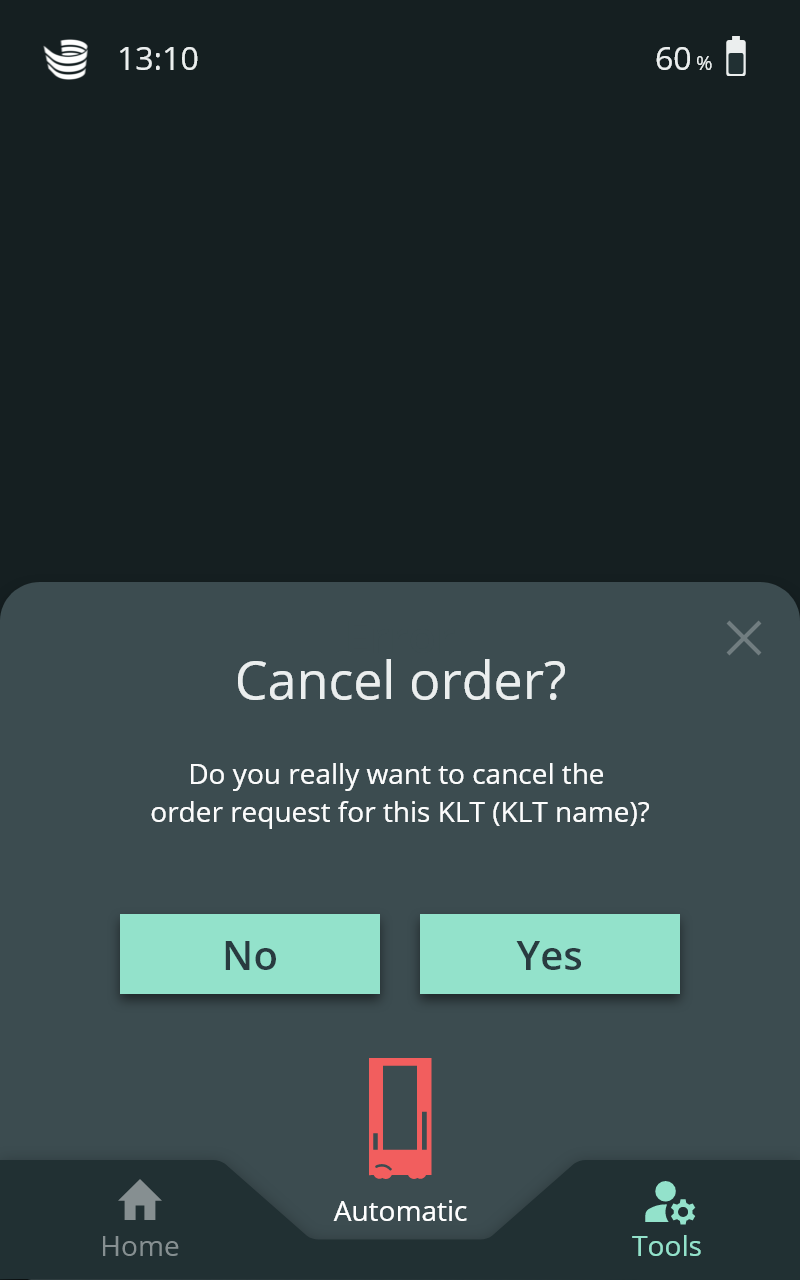
Abort order manually
|
Abort manually |
The current request is aborted manually. |
|
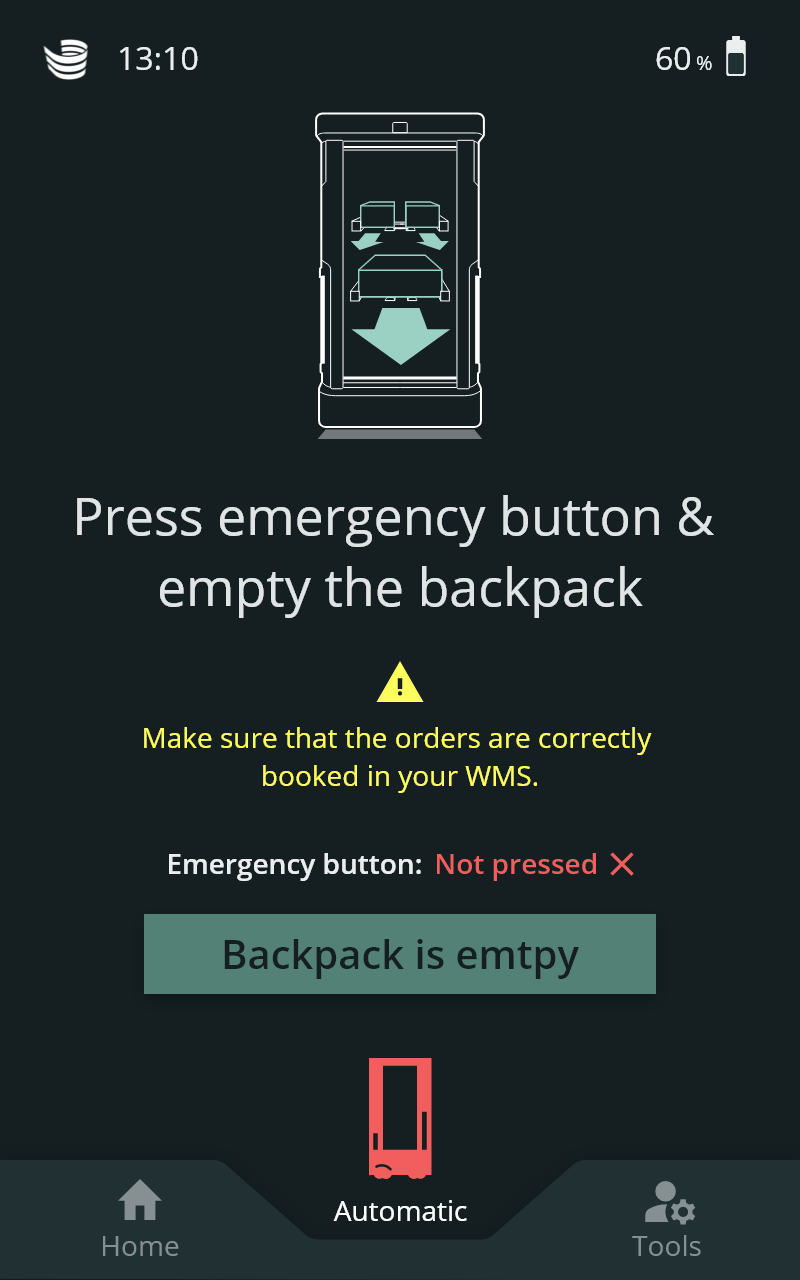
System reset
|
The robot deletes all its orders and all critical events are automatically acknowledged. The user must remove all load carriers from the backpack manually. Please make sure to resolve any potential conflicts with the WMS transport jobs! |
Reset the robot |
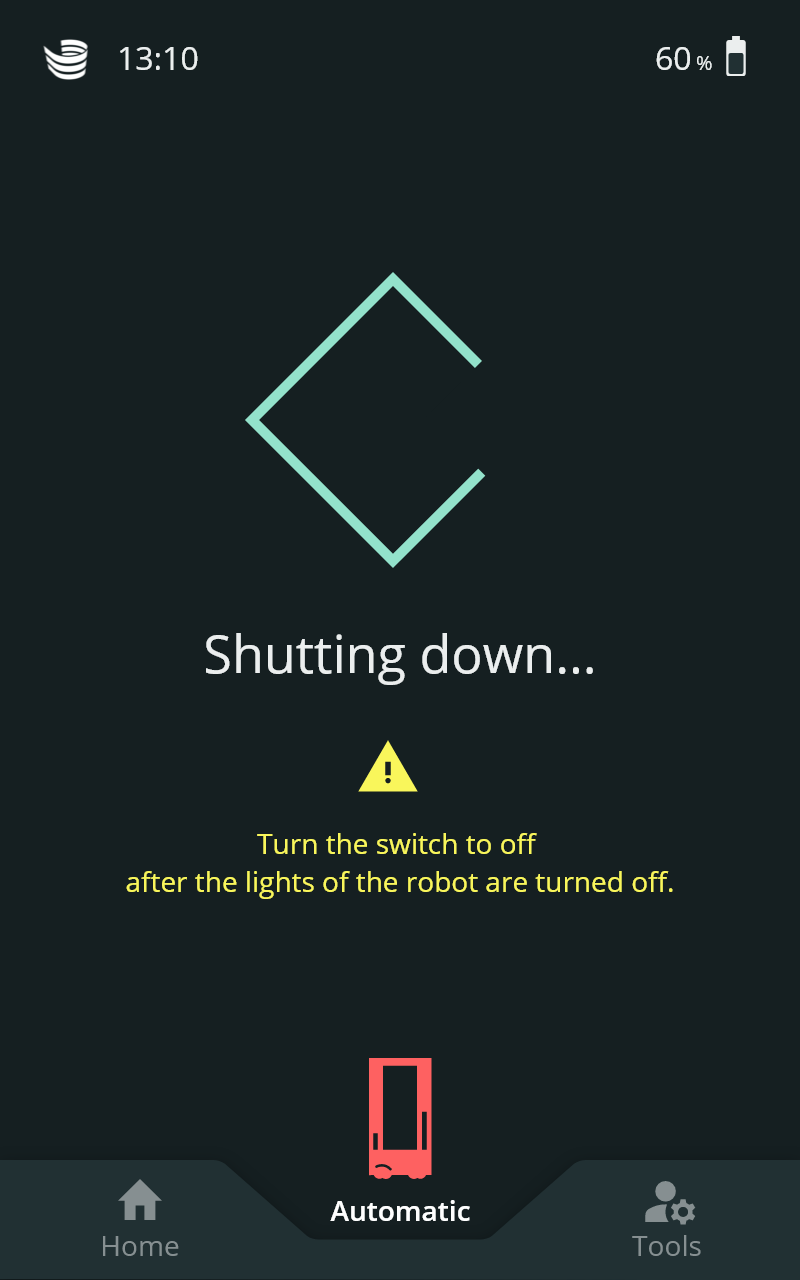
System shutdown
|
The robot is completely switched off. Please turn the “On/Off” switch when the robot is completely switched off (LEDs and SOTO display are turned off). Please wait 10 seconds before turning SOTO back on. |
Shut down robot |
Support
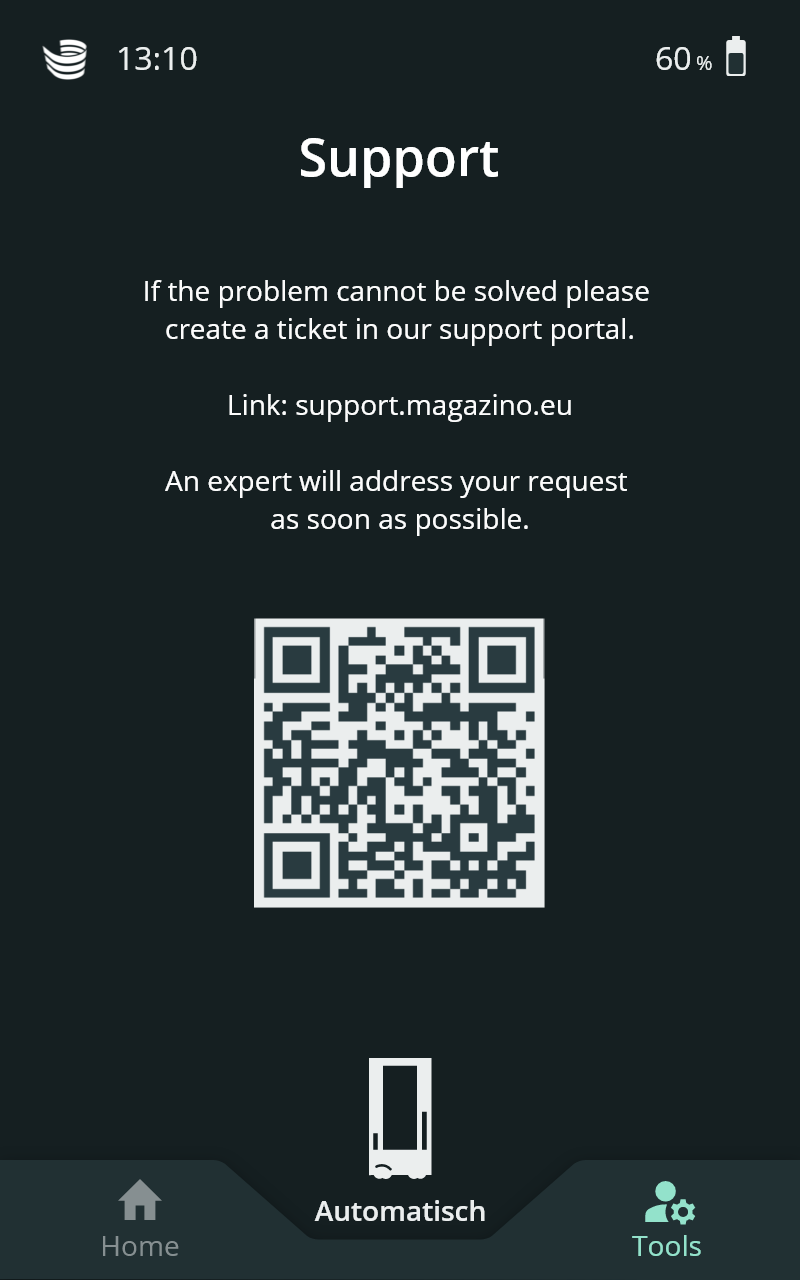
If the error cannot be resolved or if there is a need to report an issue, press the “Contact support” button. The SOTO display will present the following instructions:
|
Contact support |
The QR code shown on the SOTO display links directly to the Magazino support desk. Report the issue in our ticketing system to receive support! If the SOTO installation was done by an integration partner instead of Magazino, the integrator should be your first point of contact. |
|
Robot settings
The robot settings section shows all important information about the robot, its software components and their status.
-
Name and model
-
Software versions
-
Active environment
-
Connection status
You can change the system language in robot settings if required.
Safety field tracing
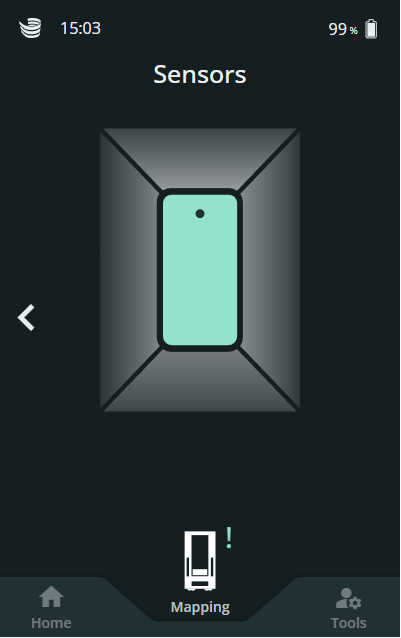
If a safety field is triggered and the cause is not immediately clear, the SOTO display provides further help.
|
The display shows the status of each small safety field. As soon as one or more of the small safety fields are violated, the respective field is highlighted in yellow.
|
Sensors |
Re-Localization
In some cases, SOTO might not recognize its precise location within the building due to a loss of localization. If this occurs, manual re-localization is required. This can be done by manually driving the robot back to its charger. Once back at the charger, the robot will automatically re-localize and resolve the error.
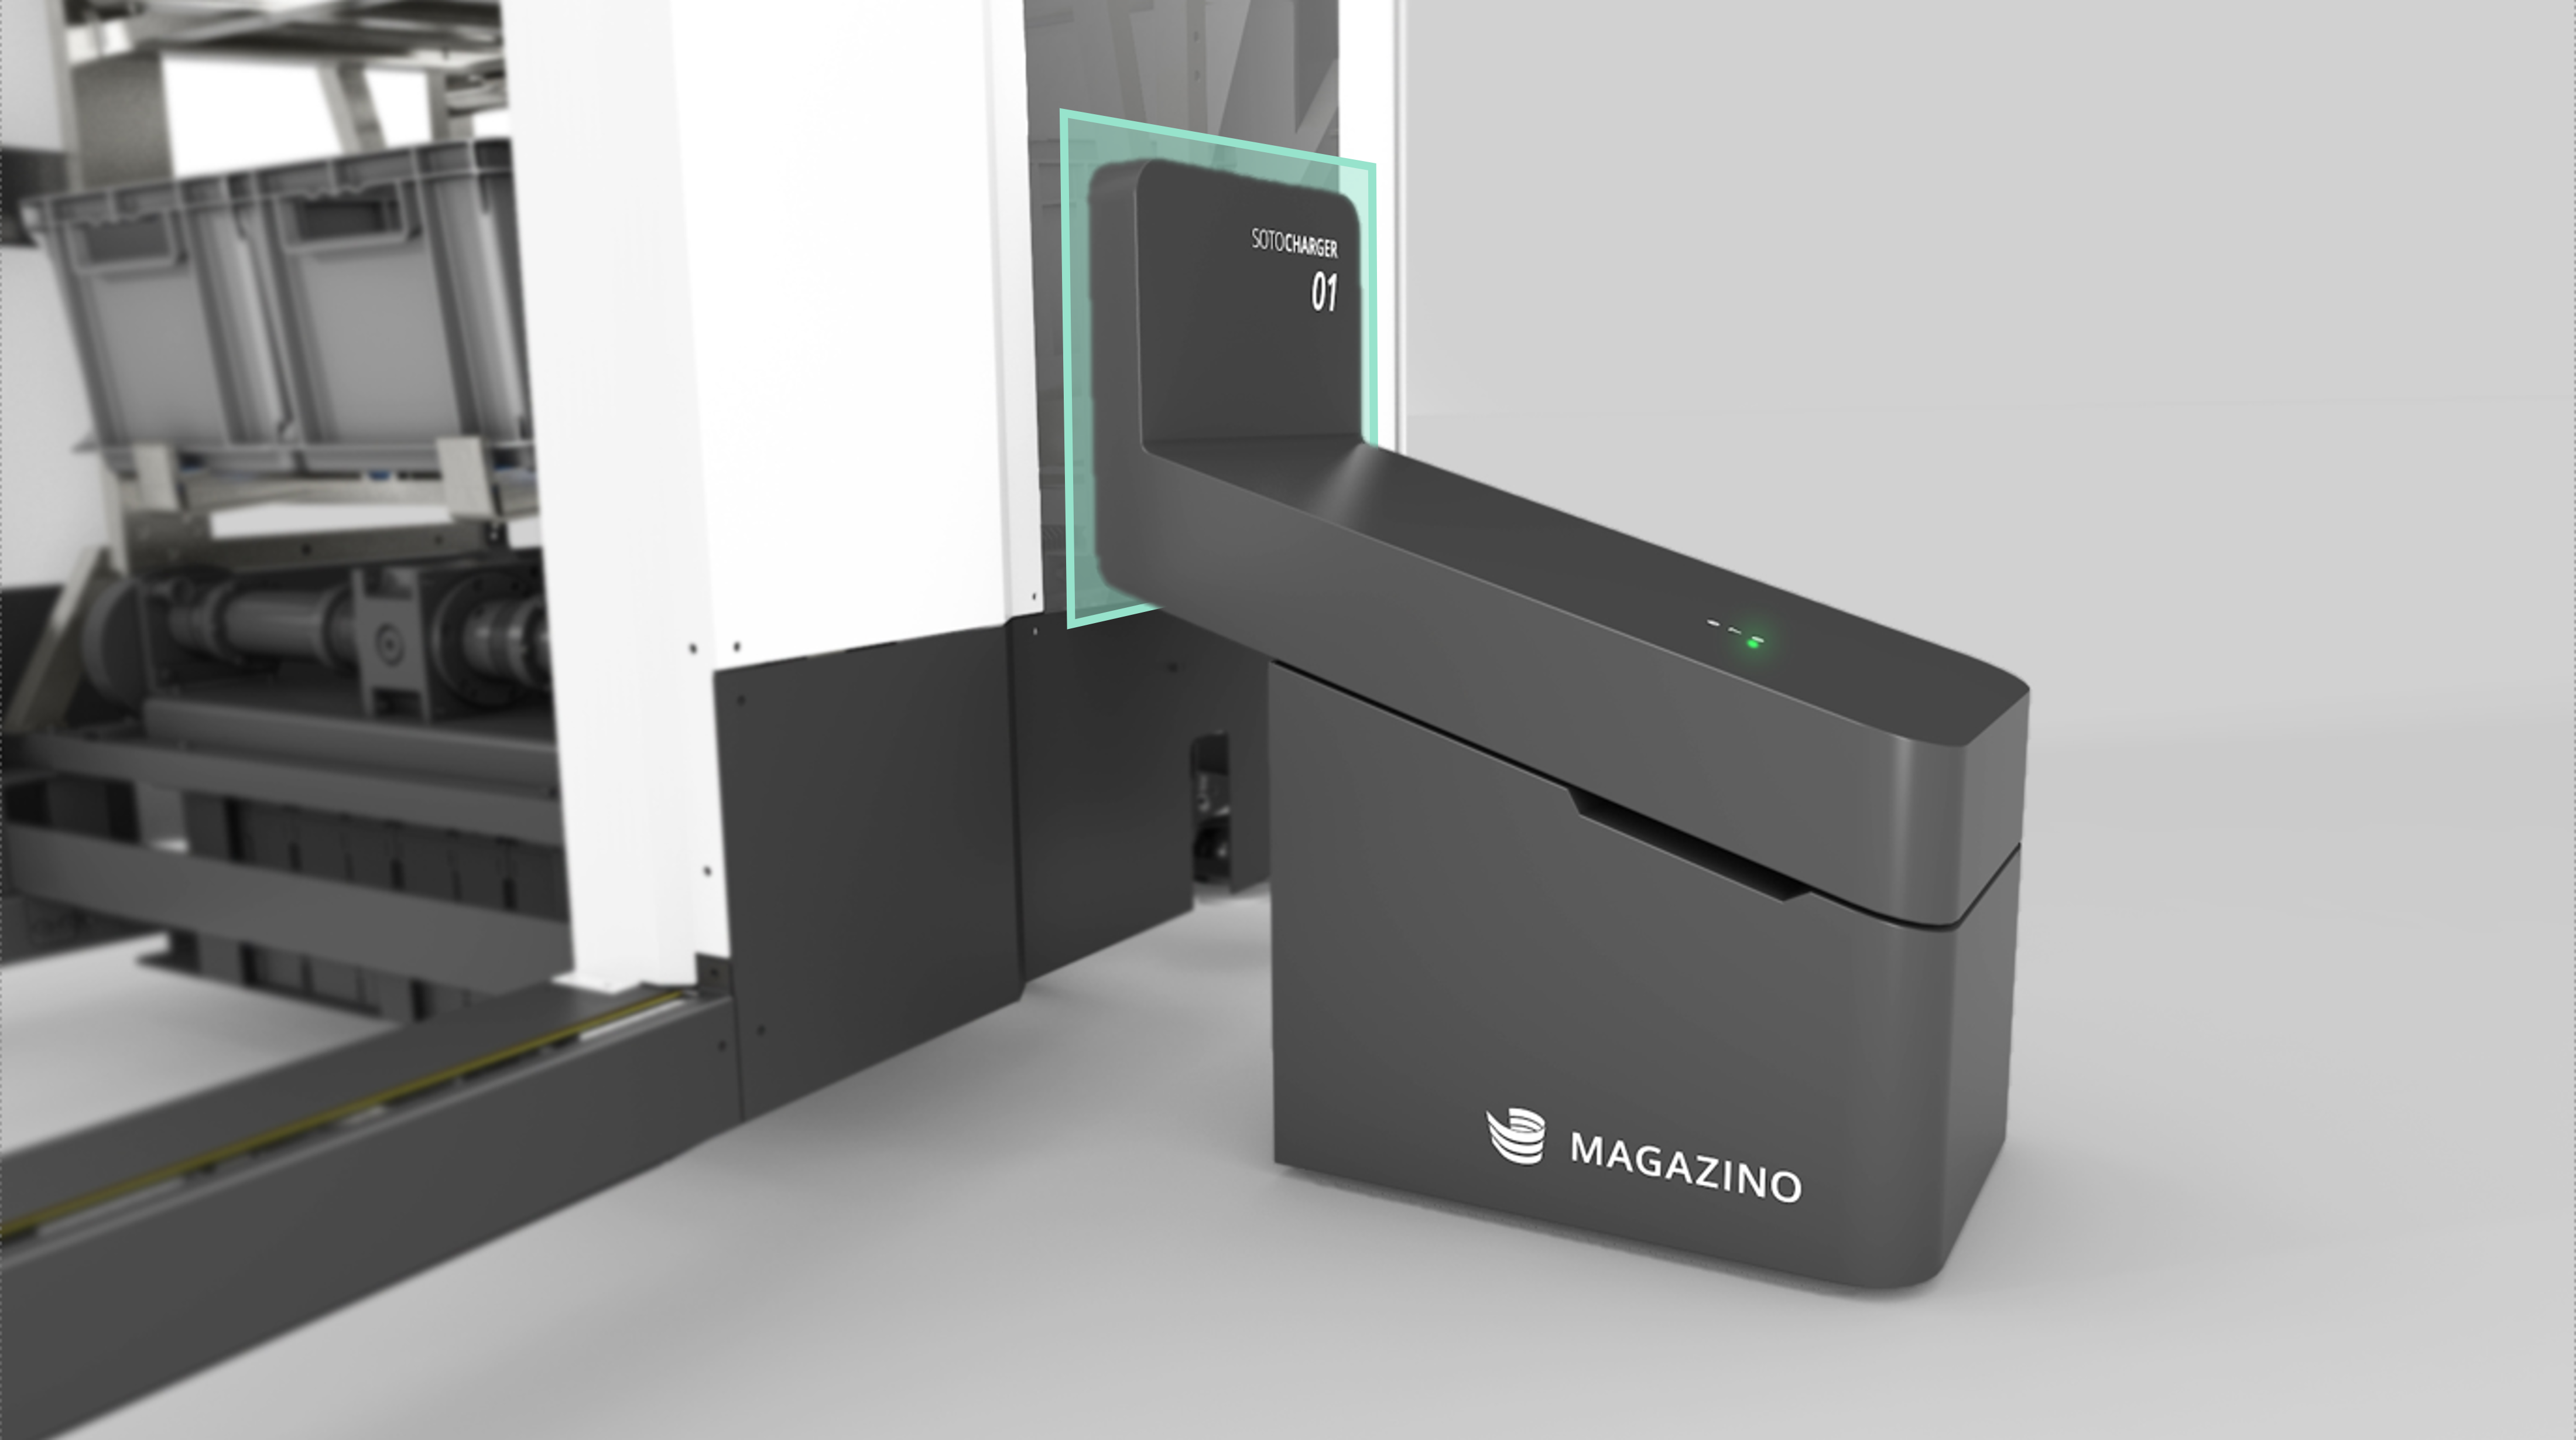
Re-localization is often required when switching from manual or mapping mode to automatic mode.
Manual mode
SOTO can be driven manually by switching the robot into manual mode.
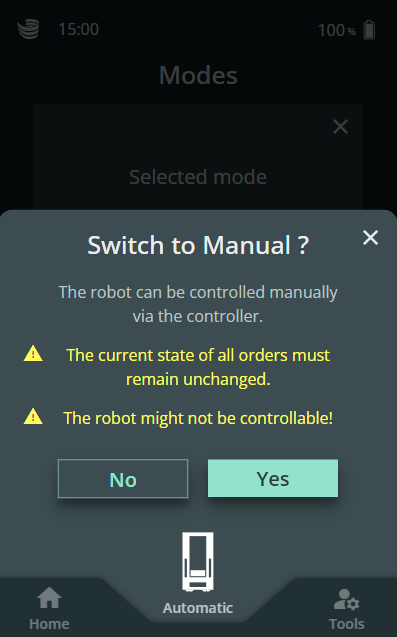
To switch operating modes, click on the mode select button in the bottom center of the display (large SOTO icon).
If there are still active orders inside the backpack, please do not change the state and position of the load carriers.
Controller storage location
SOTO can be operated using a handheld controller. The controller is stored in a bracket in the rear panel of the drivebase.
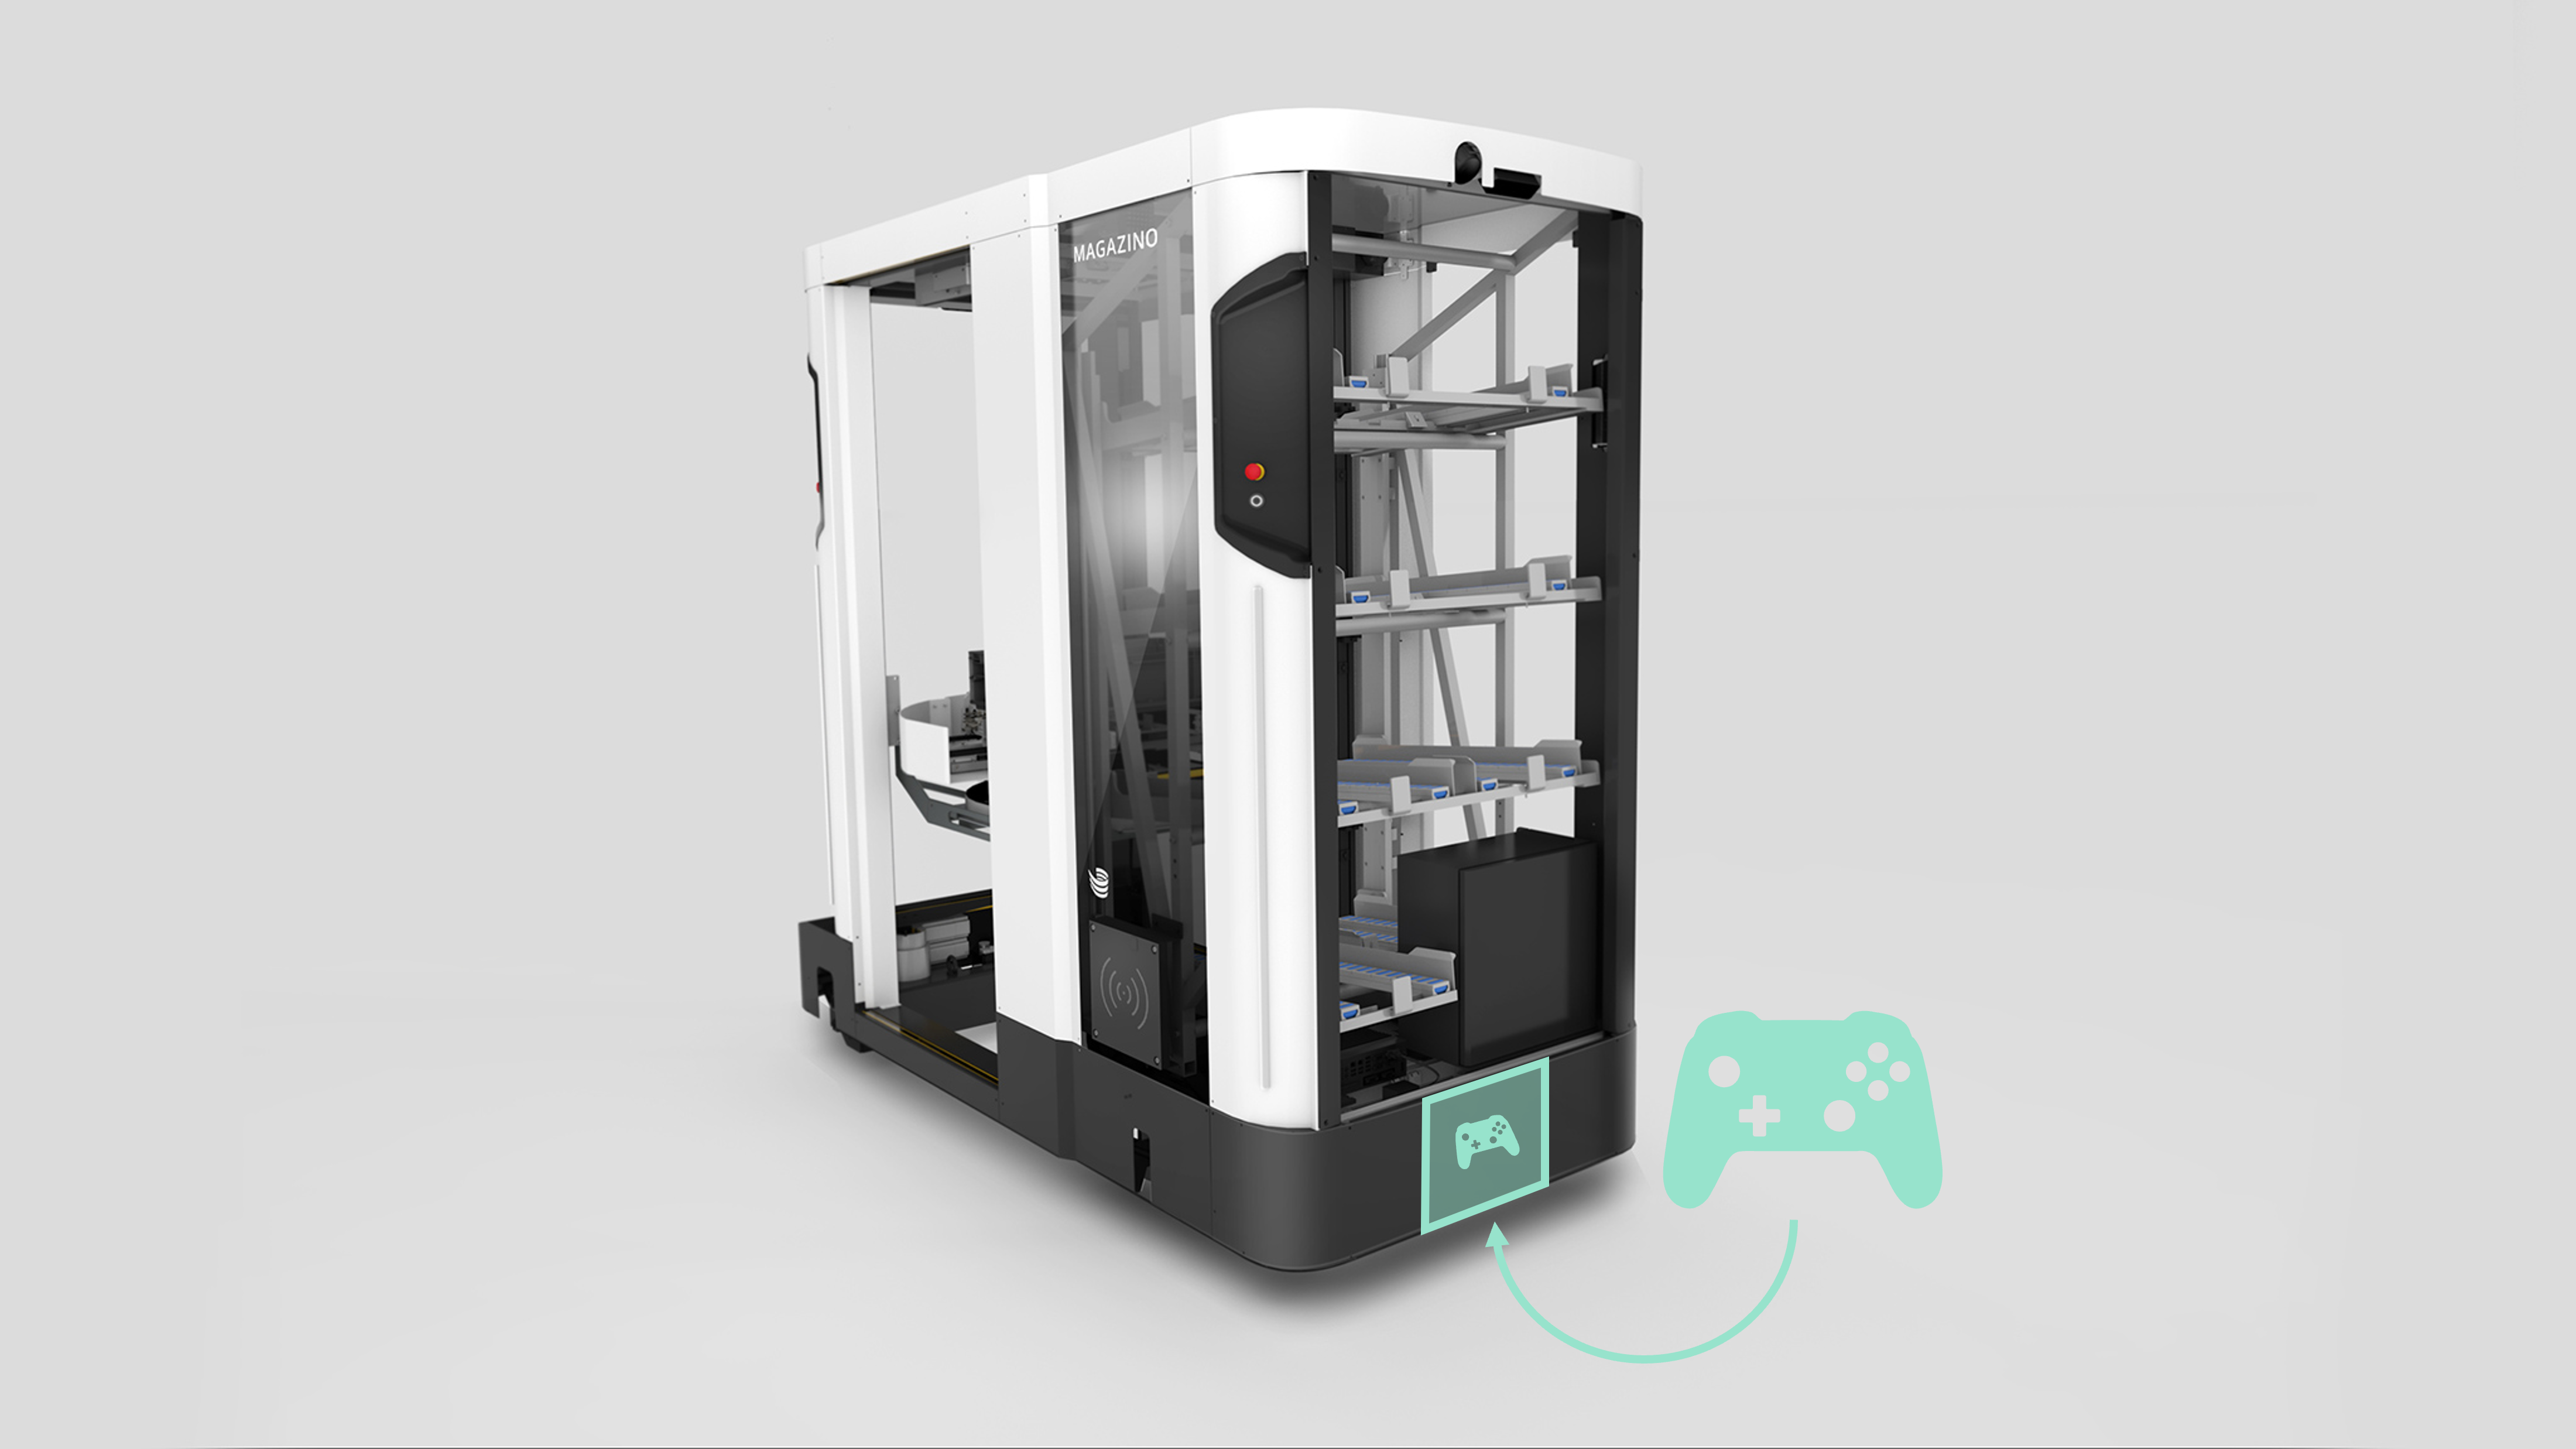
Connecting the controller
Once you have retrieved the controller from its bracket it has to be connected to SOTO:
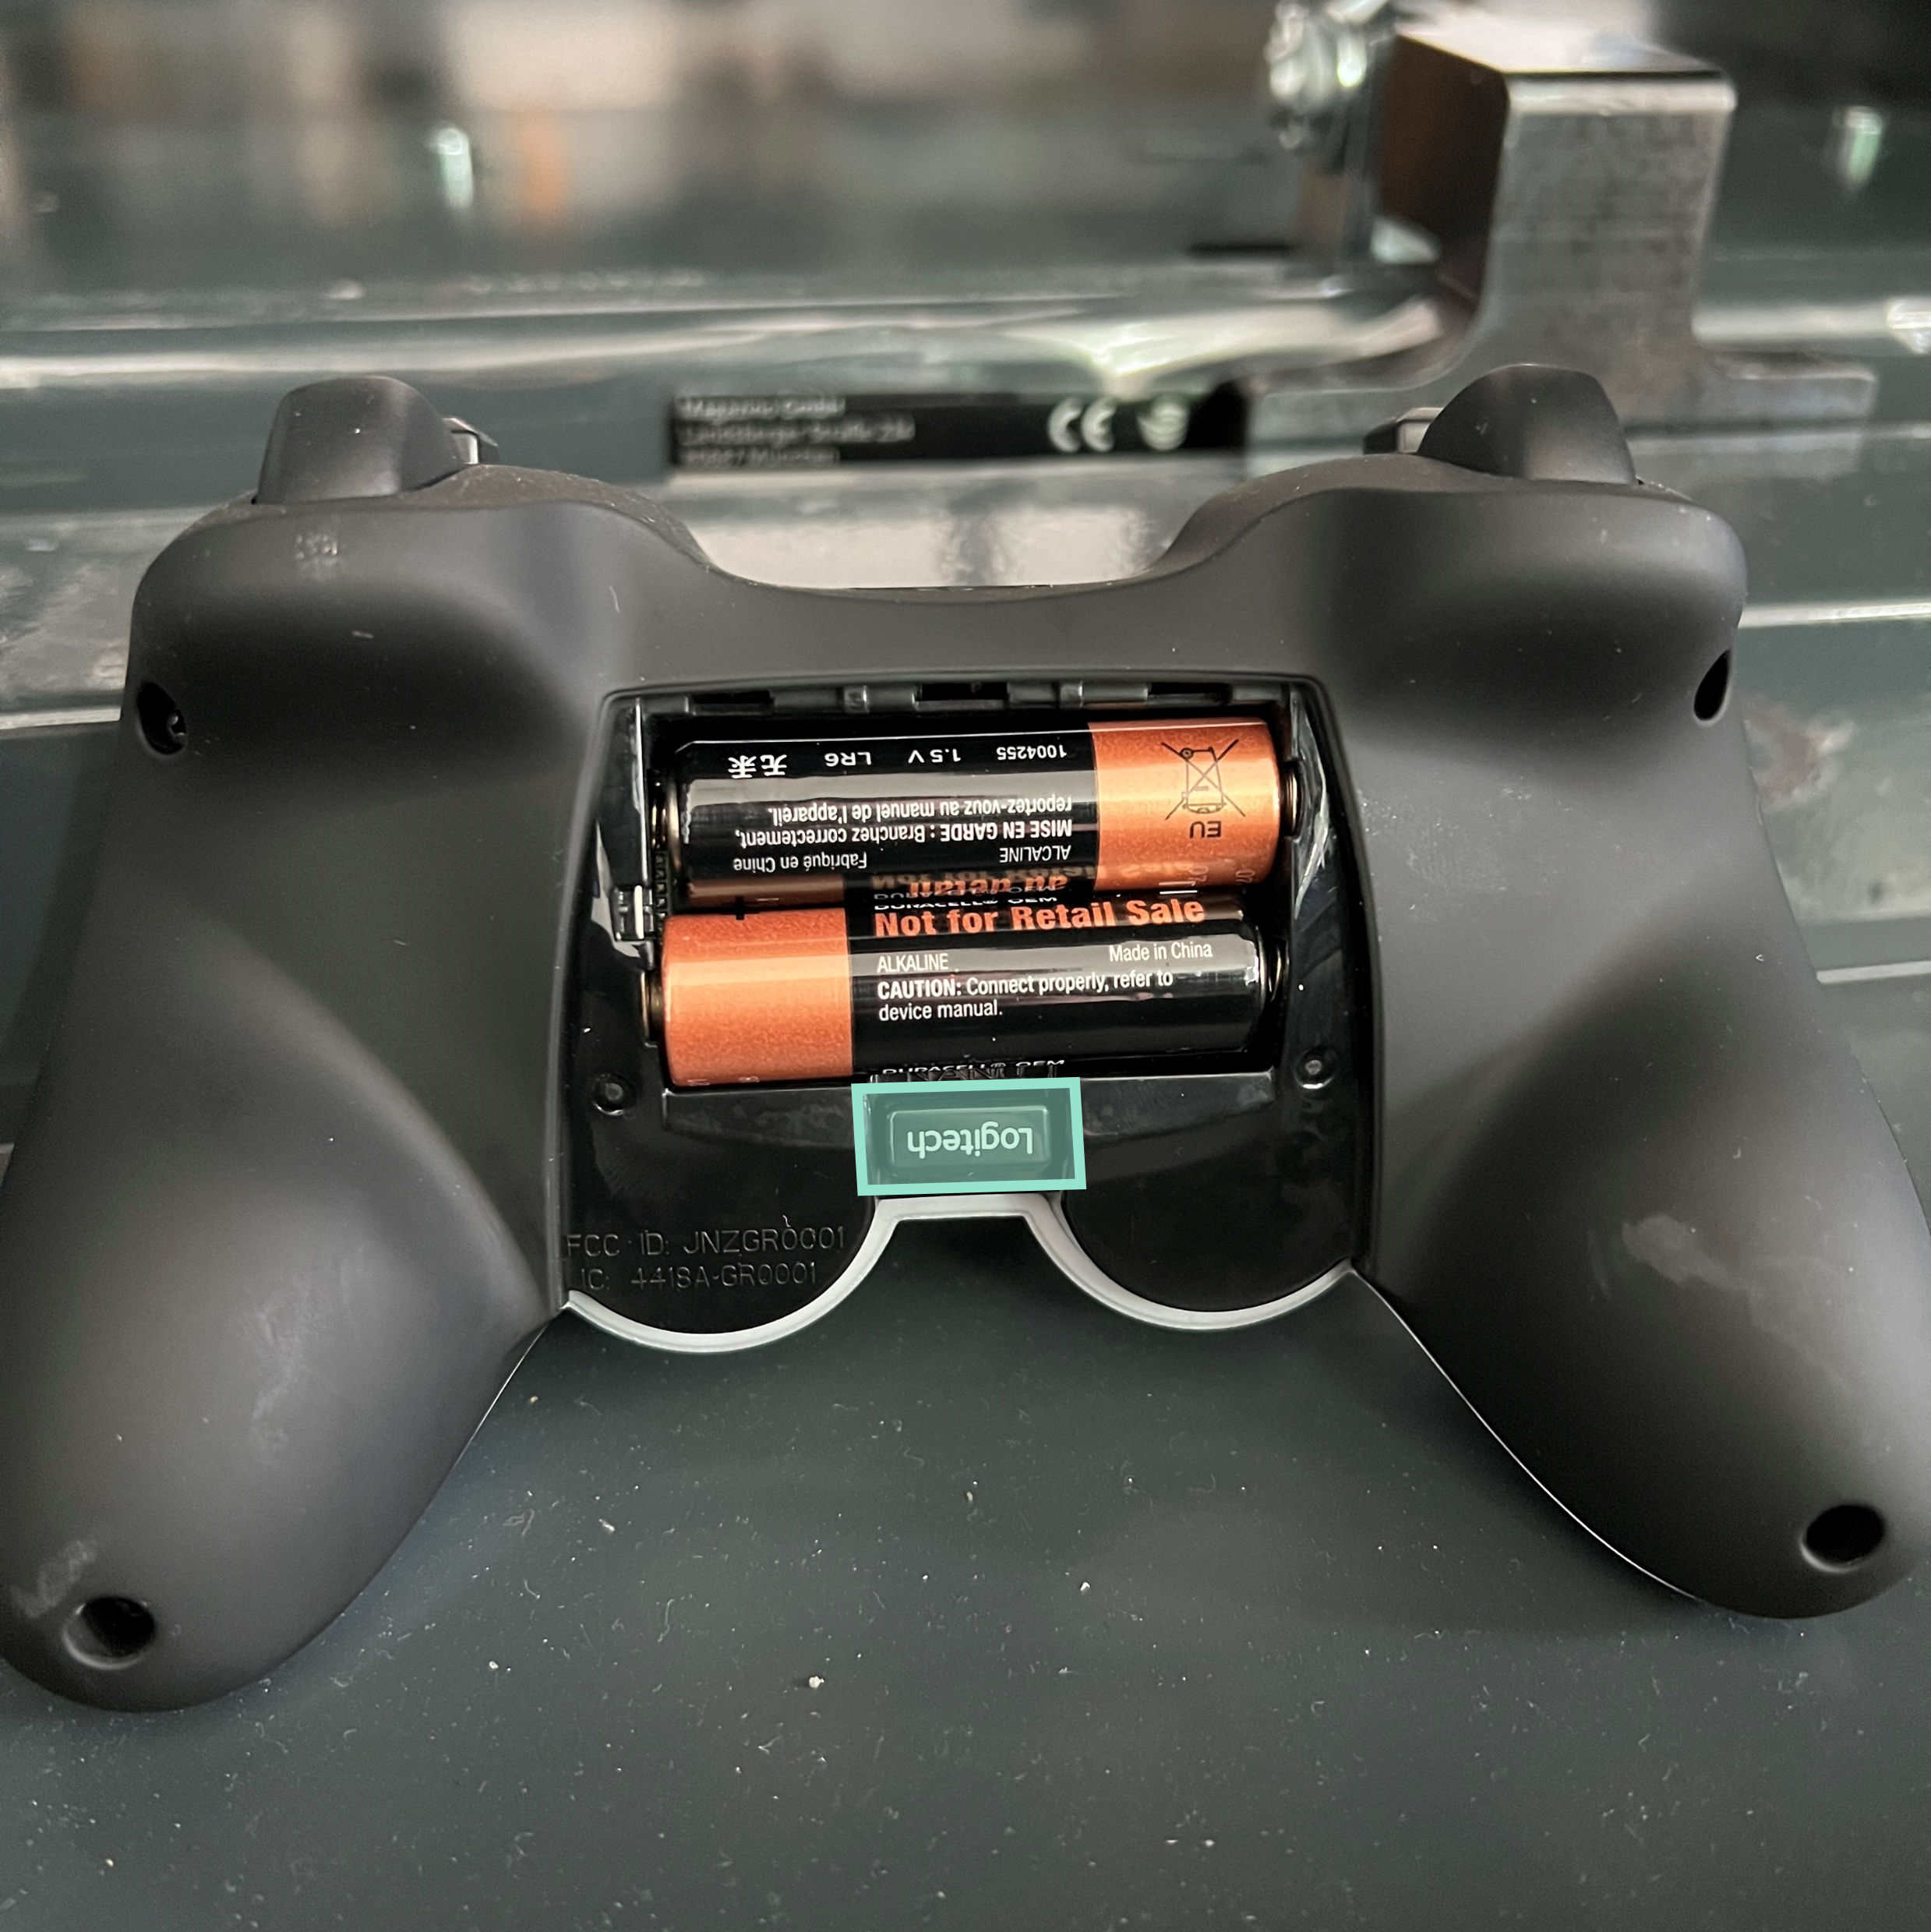
The USB dongle is stored in the battery compartment of the handheld controller.
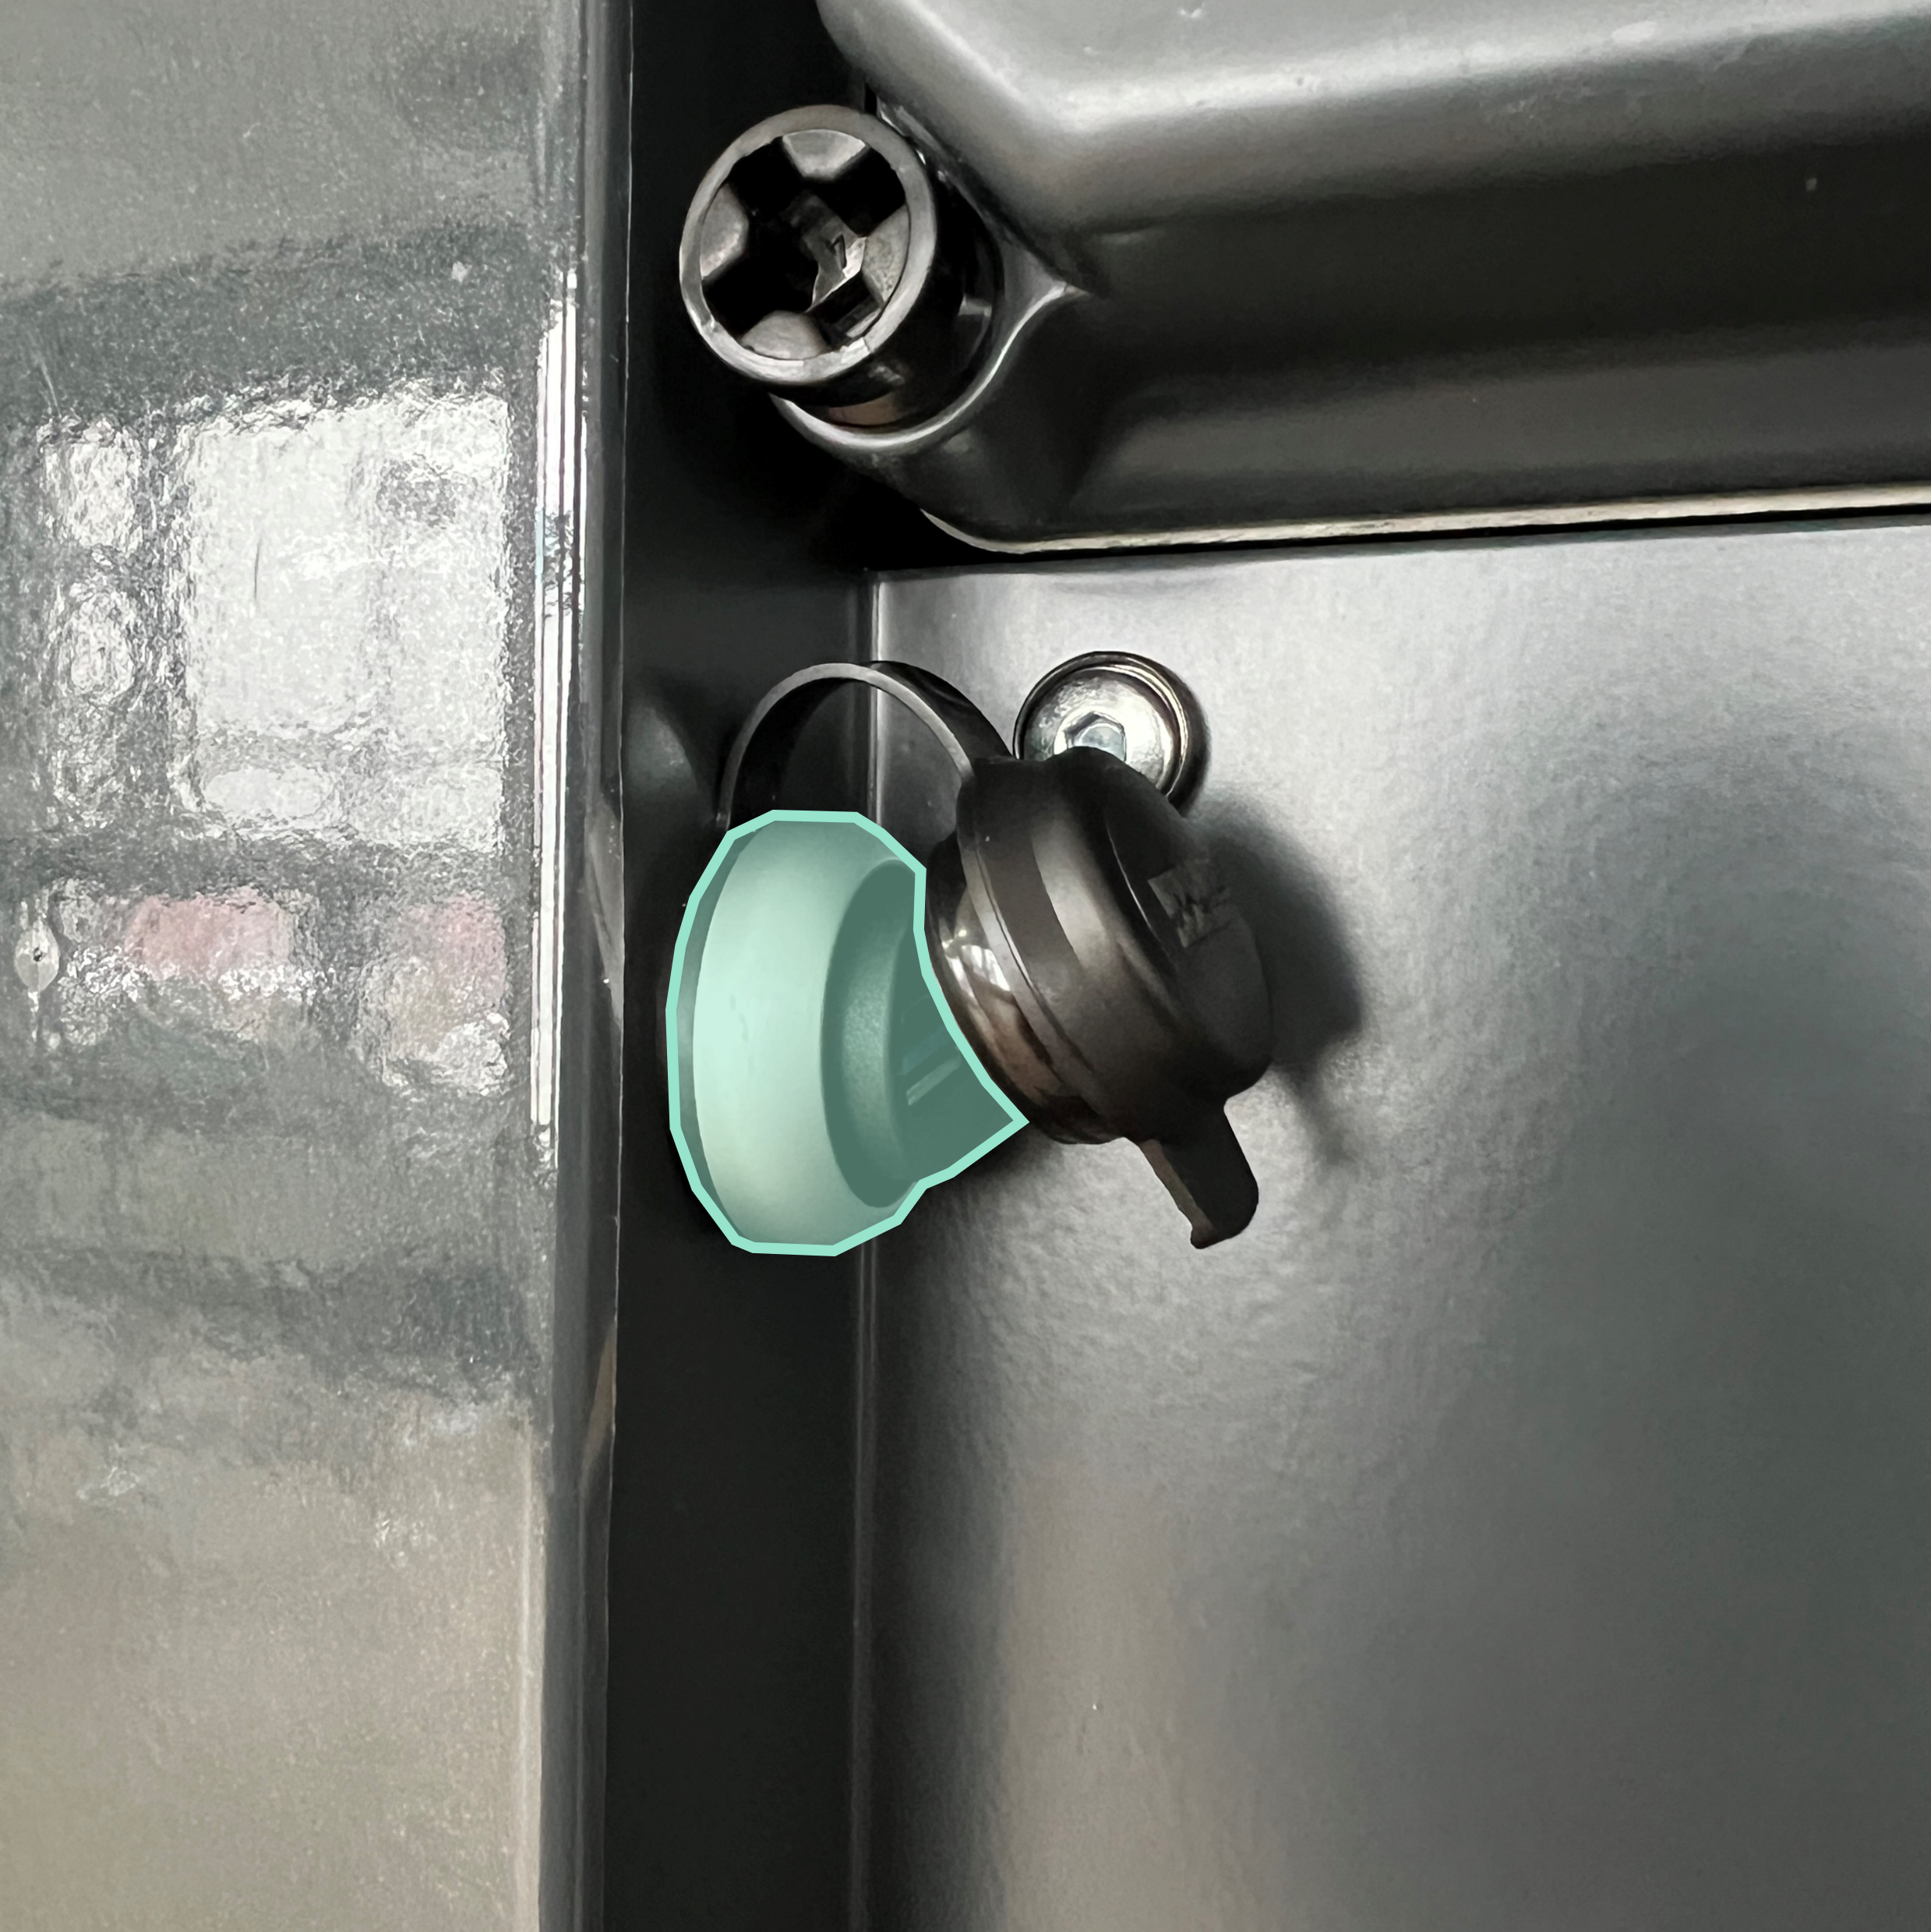
The USB port is located on the right-hand side of SOTO’s backpack.
Once the USB dongle is plugged into the USB port, the connection can be initiated using the 'Start' button on the controller. If the connection was successful, a green controller symbol will appear in the header of the SOTO display.
Moving the robot with the controller
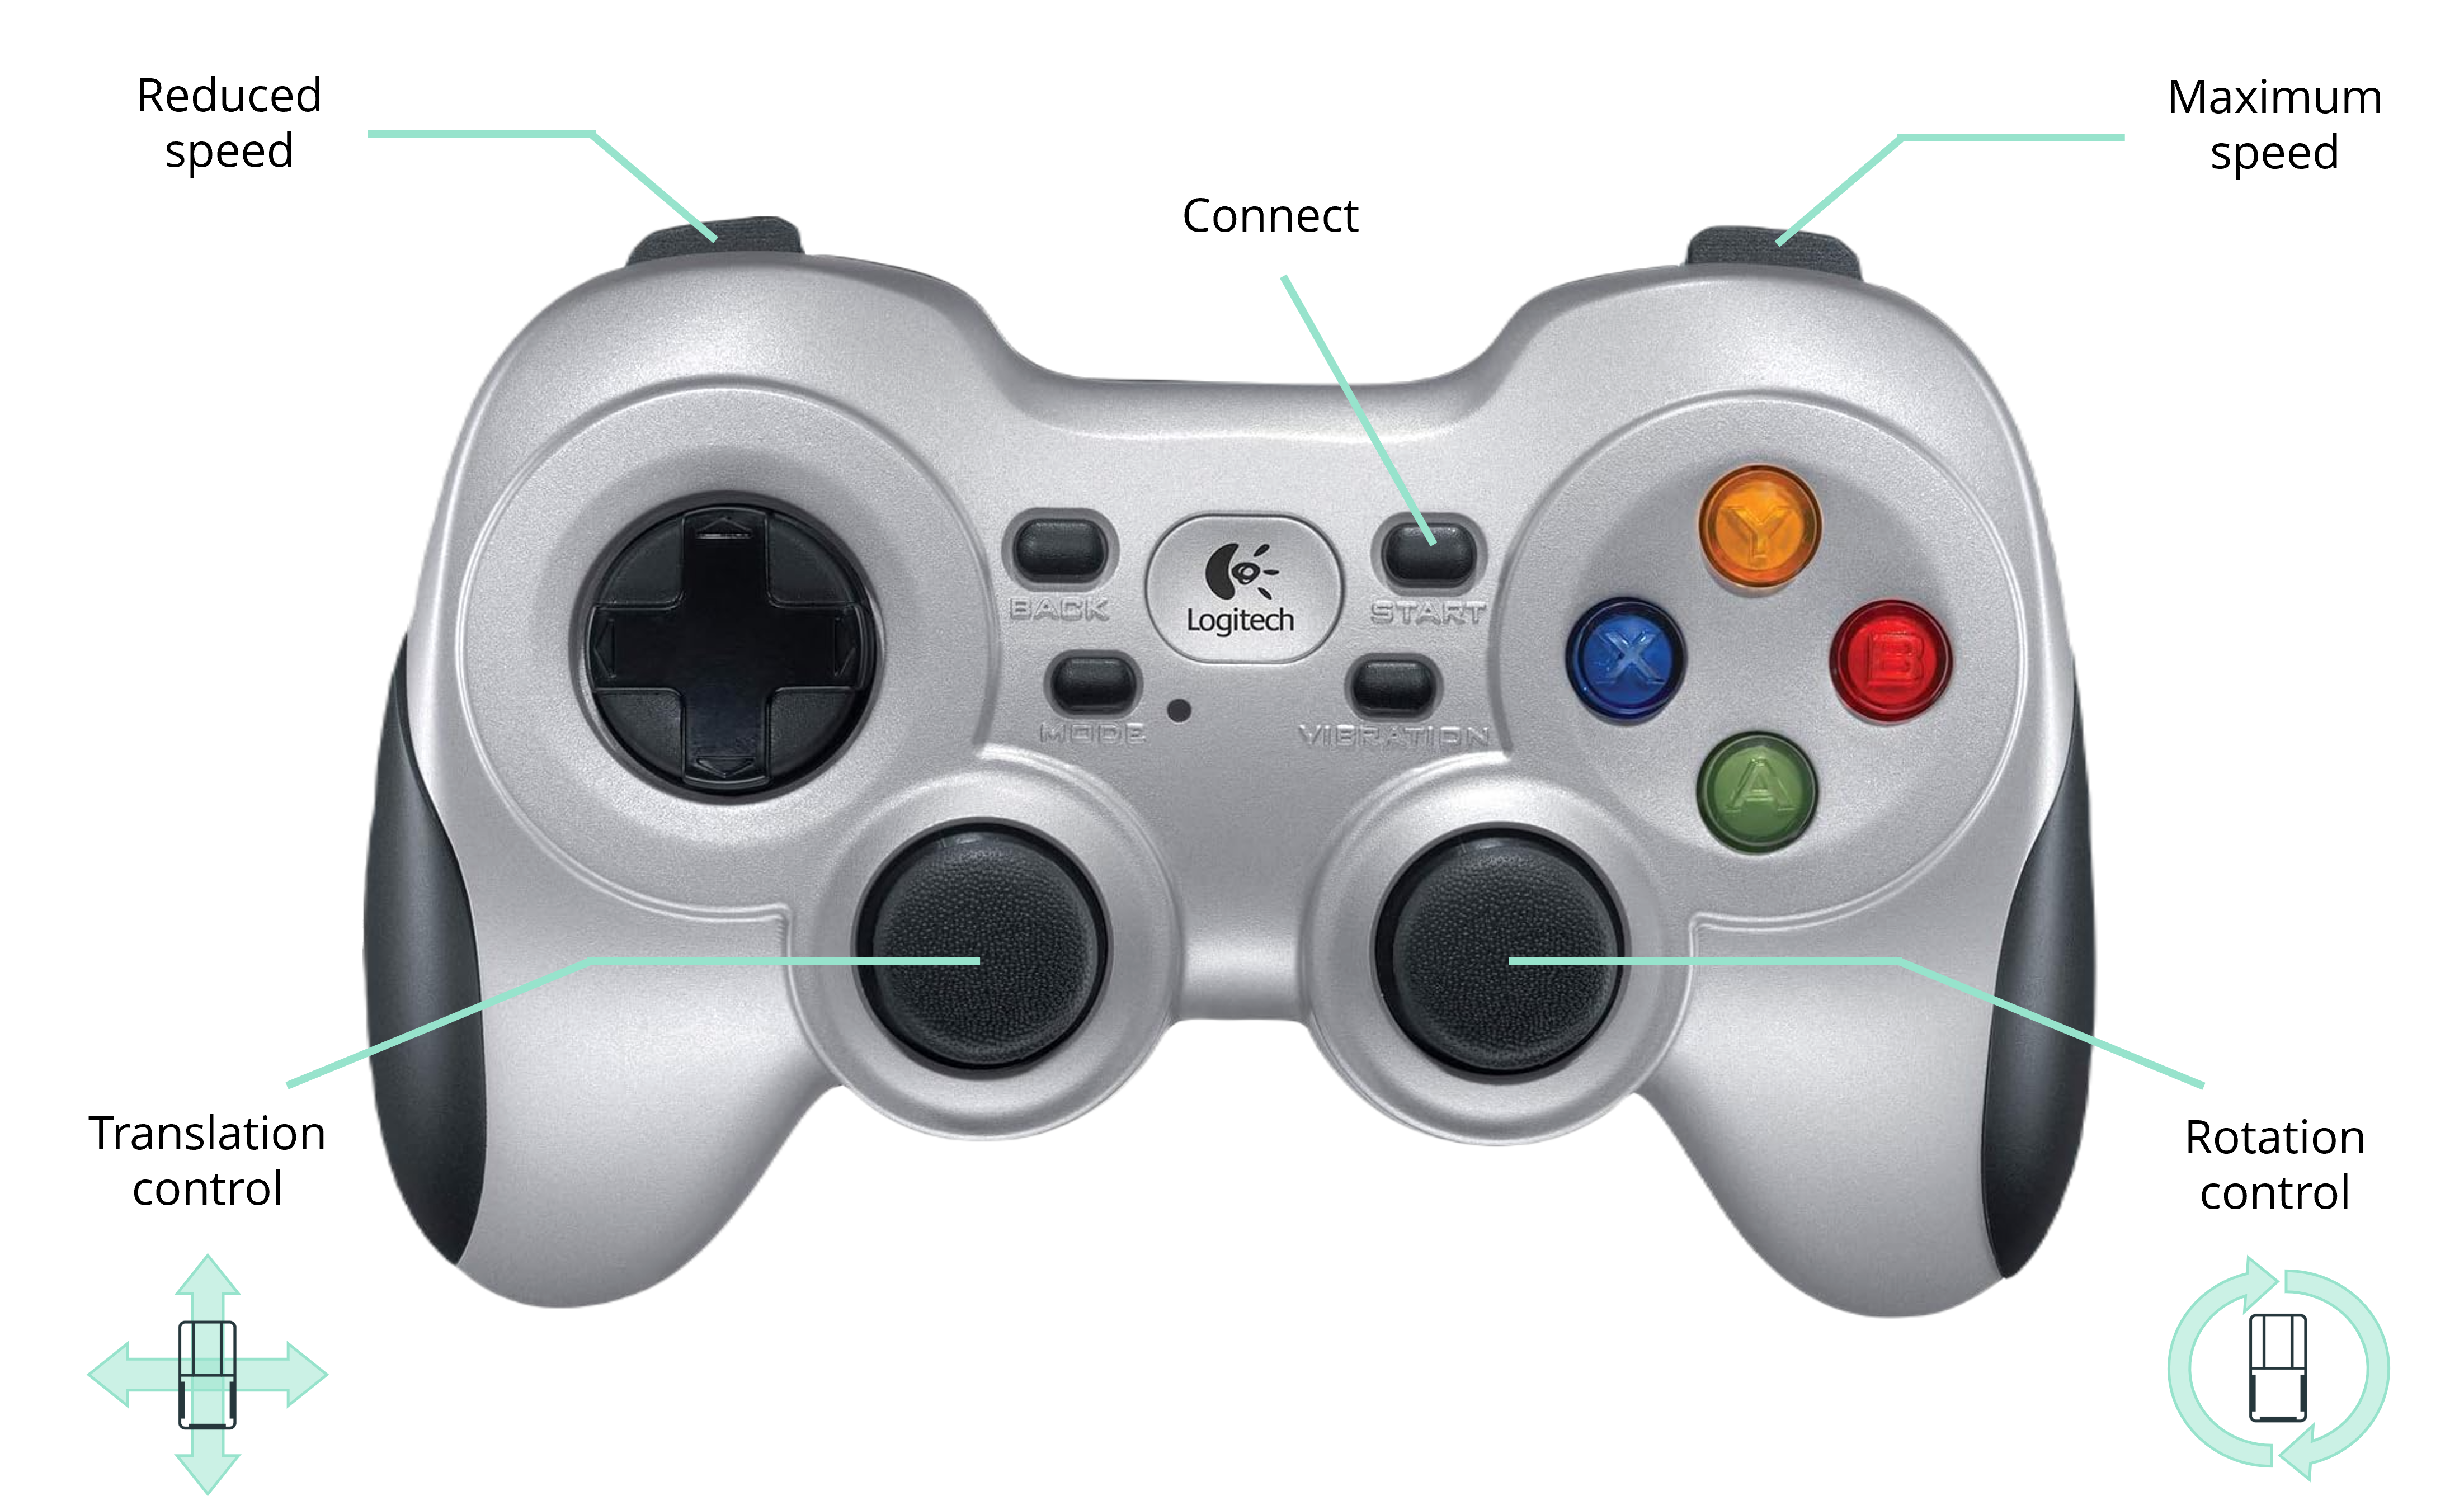
The robot can now be controlled by the handheld controller. Navigate the robot to its intended target position.
The maximum speed of the robot is set to 0.3 m/s by default.
Always use reduced speed when moving the robot close to obstacles that are not detected by the laser scanners — especially the charger.
The safety sensors remain active in manual mode. The robot automatically reduces its speed if the safety fields are violated by nearby obstacles. Keep in mind that the bottom laser scanners only detect obstacles at 0.12 m height.